
Blackberry Rosemary Lemonade
After the crepe debacle this morning, I thought I needed to post a success story to make me feel better about my day. I had some blackberries in the fridge that I was trying to decide what to do with, and since I was out of every kind of beverage possible - I haven't grocery shopped yet - I thought I could use them to make a blackberry lemonade.
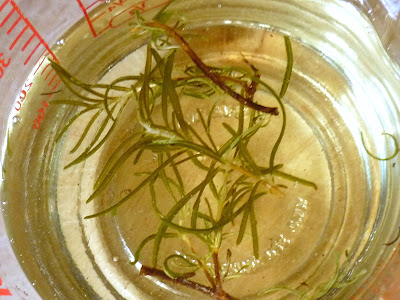
But I didn't want just any kind of blackberry lemonade, I wanted something a little more creative, and my eyes fell on my new rosemary plant, sitting so innocently on my windowsill.
Much to the little plants surprise, I plucked a few sprigs and thought - blackberries, rosemary, lemons - how bad could it be? I set about making a simple syrup for the lemonade, and added the rosemary. Man oh man, this was good. I had never tasted rosemary used in a sweet way, but it is great.
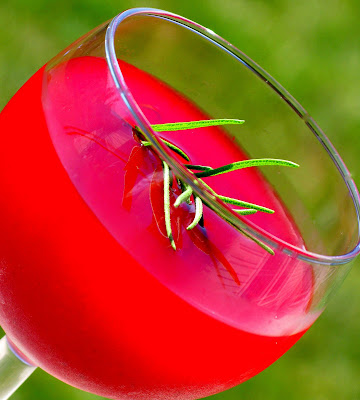
My mind was racing with the possibilities of what I could do with just this rosemary syrup. With the blackberries and lemonade added, the final result was really good, and could even handle a little more rosemary next time. I only used 2 sprigs, but will use 3 next time.

But I didn't want just any kind of blackberry lemonade, I wanted something a little more creative, and my eyes fell on my new rosemary plant, sitting so innocently on my windowsill.
Much to the little plants surprise, I plucked a few sprigs and thought - blackberries, rosemary, lemons - how bad could it be? I set about making a simple syrup for the lemonade, and added the rosemary. Man oh man, this was good. I had never tasted rosemary used in a sweet way, but it is great.
My mind was racing with the possibilities of what I could do with just this rosemary syrup. With the blackberries and lemonade added, the final result was really good, and could even handle a little more rosemary next time. I only used 2 sprigs, but will use 3 next time.

Blackberry Rosemary Lemonade
1 1/2 cups sugar
1 cup water
3 sprigs fresh rosemary
1 1/2 cups blackberries
juice of 4 lemons
5 cups water
In a small saucepan, heat one cup of water, the sugar, and rosemary over medium heat and bring to a boil. Boil for about 8 minutes, then remove from heat, cover and let steep for 1 1/2 hours. When you are finished it will look like a pale green syrup. Remove the rosemary sprigs from the syrup.

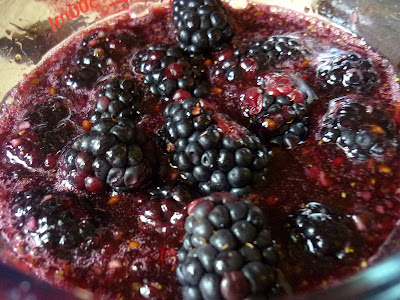
Now add the blackberries to the syrup. Using a stick blender, blend until smooth.

Strain the blackberry syrup into a large bowl, using a spoon to push all of the syrup through the strainer. Discard the leftover seeds. Pour the lemon juice into a pitcher, and add about 5 cups of water. You can use more or less depending on how strong you like your lemonade. Now pour the blackberry rosemary syrup into the lemonade and stir. Chill before serving. Serve with fresh rosemary sprigs and a slice of lemon. Enjoy!

Yum.
Who Killed the Crepes? A Kitchen Catastrophe
There is a little known fact about me; I have the extraordinary talent of being able to kill any plant that has the misfortune of coming home with me. I don't know how I do it, it just happens. My talent was recently unleashed on my sons preschool flowerpot that was sent home. Little did his teacher know the fate she was sending the poor thing to. I present the remains of what would have been a Marigold....I think?
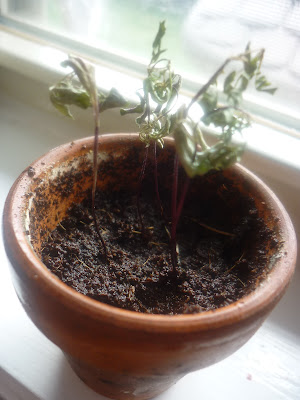

As you can see the soil is wet. Upon seeing his poor wanna-be flower on the brink of death, the little guy ran to the bathroom to baptise it in water, hoping to bring life back again. I felt too guilty to crush his dream.
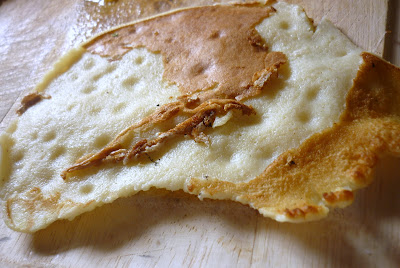
It seems my plant butchering talent has now expanded to include crepes. I had the grand ambition today to make us fruit crepes for breakfast. I have never attempted to make a crepe before, but didn't think I would have any problems. But instead of creating an eye pleasing breakfast, my talent took over. The mission: To mutilate and destroy beyond all recognition. The Target: The unsuspecting Crepe.

As you can see, this was not a successful attempt. What started out as a fun breakfast adventure, turned into a batter flinging, crepe crushing, nightmare. Most of them ended up dumped unceremoniously into the trash, but the few I was able to salvage I filled with cut up nectarines, kiwi, and banana. Once sprinkled with a little powdered sugar, I was able to pass them off to my son as something halfway edible. Apparently I need to do a little more research and practising of my crepe making technique.
Cherry-Limeade Streusel Cake

I bought these awesome Rainier cherries at the store today, and knew I wanted to use them with my limes to make a cherry-limeade inspired dessert. This type of cherry is sweeter and prettier than other cherries, with a gorgeous blush colored skin. I had a hard time not eating them all before they went into this cake.
The recipe started as a brainstorm, and evolved as I started making it, as I added a little of this and that. Although the cherries originally started on top of the cake, and ended up sinking to the bottom, I was very pleased with the way it turned out. Topped with a golden crumb topping and drizzled with a lime glaze, this moist cake was everything I hoped for.
The recipe started as a brainstorm, and evolved as I started making it, as I added a little of this and that. Although the cherries originally started on top of the cake, and ended up sinking to the bottom, I was very pleased with the way it turned out. Topped with a golden crumb topping and drizzled with a lime glaze, this moist cake was everything I hoped for.

Cherry-Limeade Streusel Cake
Cake:
4 Tbsp butter, unsalted and room temperature, plus more for skillet
1 cup all-purpose flour, plus more for skillet
1/2 tsp baking powder
1/4 tsp baking soda
1/4 tsp salt
3/4 cup sugar
1 large egg
1/2 cup buttermilk
1 pound fresh cherries, halved and pitted
1 lime, zested and juiced
Streusel Topping:
1/2 cup all-purpose flour
1/4 cup butter, chilled and cut into pieces
1/4 cup sugar
1/4 tsp salt
Lime Glaze:
4-5 Tbsp powdered sugar
1/2 lime, zested and juiced
3 drops of almond extract
For the streusel topping: Place the flour in a small bowl and add the butter. Using a fork, cut the butter into the flour until the mixture resembles coarse crumbs. Add the sugar and salt, mixing it in with a fork. Set aside.
For the cake: Preheat oven to 375F. Cut the cherries in half and remove the pits. Place the cherries in a small bowl, and pour the juice of one lime over them, tossing lightly to coat. Set aside. Butter an 8-inch ovenproof skillet (or an 8-inch cake pan), and dust with flour, tapping out the excess. In a medium bowl, combine the flour, baking powder, baking soda, and salt. Using a mixer on medium speed, beat the butter and sugar until pale and fluffy. Beat in the egg. Gradually add the flour mixture, alternating with the buttermilk. Remove the cherries from the lime juice, and pour the lime juice into the batter. Add the zest from the lime you juiced for the cherries. Stir just until combined.
Pour the batter into the prepared skillet, and smooth the top with a spatula. Scatter the cherry halves on top of the batter, the sprinkle half of the streusel topping over the cherries. Bake for 25 minutes, then sprinkle the remaining streusel topping over the top of the cake. Bake for another 10 to 15 minutes, until cake is golden brown and a toothpick inserted into the center comes out clean. Remove pan from the oven and let cool for at least 30 minutes, up to an hour. In the meantime, combine the powdered sugar, lime juice, zest, and about 3 drops of almond extract. Set aside.
Once the cake has cooled, place a plate upside down, over the top of the skillet. Holding the bottom of the plate, quickly turn the skillet over so that the cake is streusel side down on the plate. Place your serving platter upside down over the cake, and flip again, so the cake is now streusel side up. Drizzle the lime glaze over the top of the cake. If desired, garnish with fresh cherries and a lime slice. Enjoy!

Ravioli with Balsamic Brown Butter

I like to take advantage of my husband being out of town, by making things for dinner that I think he would be too picky to eat. As a result, I had a brown butter extravaganza today, making Ravioli with Balsamic Brown Butter, and Brown Butter Pecan Shortbread. I will feature the shortbread in my next post. I have been wanting to try the ravioli ever since I saw Giada De Laurentiis make it on her show the other day.
I knew at once that I would like it, even though I had never actually made a brown butter sauce before. The recipe is very simple with few ingredients, but don't let that fool you. The nutty flavor of the brown butter and the tangy sweet flavor of the balsamic vinegar, make a very comforting combination. Topped with toasted walnuts and freshly grated parmesan cheese, this dish will be a new favorite of mine.

Ravioli with Balsamic Brown Butter
(recipe by Giada De Laurentiis)
18-20 store bought ravioli (cheese, spinach, or mushroom)
6 Tbsp butter, unsalted
2 Tbsp balsamic vinegar
1/2 tsp salt
1/4 tsp fresh ground pepper
1/3 Cup walnuts, chopped and toasted
1/4 Cup parmesan, grated
In a large pot, bring salted water to a boil over high heat. Add the ravioli to the water and cook for about 5-6 minutes, until the pasta is tender but still a little firm. Stir occasionally. Drain the pasta and place in a dish. Set aside.
In a medium skillet cook the butter over medium heat, stirring constantly. After about 3 minutes, the foam will go away and the butter will begin to turn golden brown. Remove from heat and let cool for 1 minute. There will be tiny brown specks at the bottom of the pan, this is what you want. Stir in the balsamic vinegar, salt, and pepper. Transfer the cooked ravioli to the pan of balsamic butter, and stir to coat. Sprinkle the walnuts and grated parmesan on top. Serve immediately and enjoy.

Crispy Chocolate Chip Cookies

When I had a hankering to bake today, I turned to the simple but trusty chocolate chip cookie. Now I realize that my next statement might be seen as chocolate blasphemy, but I'm not one of those people that sees chocolate and drops into a fit of ecstasy. I can enjoy it every now and then, but my first choice for something sweet would be fruit related. Since my husband doesn't care for fruity desserts, I usually make something with chocolate or peanut butter for him. Chocolate chip cookies are a safe bet, and the way he likes them is not the norm.
When most people think of the perfect chocolate chip cookie, they see a soft, chewy cookie with maybe even a gooey center. My husband likes them firm and crispy. Most recipes I've come across do not satisfy his definition of a good cookie, until I came across this recipe that gets nice and crispy around the edges, but stays just a little soft in the center. Cook it a few minutes longer and you have a good crisp cookie all the way through.
I experimented with my pizza stone also, baking one batch an a cookie sheet, and the other on my stone. The only differences I could detect, was the batch baked on the stone took a few minutes longer to cook, and those baked on the cookie sheet spread out a tiny bit more. As far as taste and texture went they were the same.

Crispy Chocolate Chip Cookies
2 sticks of unsalted butter, melted
3/4 cups packed brown sugar
3/4 cups sugar
2 large eggs
1 tsp pure vanilla extract
2 1/2 cups all-purpose flour
1 tsp baking soda
2 cups semi-sweet chocolate chips
1 cup chopped walnuts (optional)
Preheat oven to 375F. In a mixing bowl, combine the sugars and melted butter, and mix until combined. Add the eggs, one at a time, followed by the vanilla. Add 1 cup of the flour, and the baking soda, stirring until well combined. Add the second cup of flour, mixing well. Stir in the remaining 1/2 cup of flour. Stir in the chocolate chips and if using, the walnuts.
Place the cookies by heaping spoonfuls (I used an ice cream scoop for big cookies), onto a greased cookie sheet or one lined with parchment paper. Bake for 10-12 minutes for a crisp cookie, or 8-10 minutes for a softer cookie. Let cool on a wire rack. Enjoy!

Pizza Rustica: Men Like Meat

Pulling it out of the oven it looked good, it smelled good, it would be fine. When I took my first bite it tasted great, but very similar to a quiche. My son and I liked it, I knew my husband would be so-so, then I asked my home cooked-meal-challenged little brother what he thought. He turns to me, looking thoughtful, and says, "It's good. But I would add more meat, more cheese...and a little rosemary". Who would have thought he even knew what rosemary was? So there you have it. If you like quiche type foods, you will like this. If you're a man and like meat, then follow my brothers advice.

Pizza Rustica

The Dough:
2 Cups all-purpose flour
1/3 cup sugar
1/2 tsp baking powder1/4 tsp salt
1 stick unsalted butter, chilled and cut into pieces (or 4 oz cold shortening)
2 large eggs, lightly beaten
Put the flour, sugar, baking powder, and salt in a mixing bowl. Add the butter and cut in with a fork, until the mixture resembles course crumbs. Add the beaten eggs and mix together with a fork until a ball forms. Remove the dough and knead it a few times until it is smooth. Wrap with plastic and set aside. If not using right away, place the wrapped dough in the refrigerator.

16 oz ricotta cheese (or cottage cheese, blended until smooth)
3 large eggs
1/4 cup parmesan cheese, grated
4 oz mozzarella cheese, grated
4 slices of bacon, cooked crisp and crumbled
4 oz pepperoni, sausage, or prosciutto
2 tsp dried oregano
1/2 tsp salt
1/4 tsp freshly ground black pepper
Place the ricotta in a mixing bowl and stir until smooth. If you are using cottage cheese, then blend it until it is smooth. Add the eggs, stirring until well blended. Add the parmesan, mozzarella, bacon, and pepperoni or sausage. Stir until combines. Add the oregano, salt, and pepper, and stir.
Preheat your oven to 350F and place your oven rack in the lower third of the oven. Divide the dough into two pieces, making one ball twice the size as the other. Sprinkle your work surface with a little flour. The roll out the larger dough ball into a 12-inch circle. Transfer the dough circle to a 9 inch glass pie plate, lightly pressing the dough against the bottom and sides. If the dough tears, just patch it together with your fingers. Trim the excess dough away from the rim of the plate. Pour the filling into the pie dish and smooth the top.
Bake for 35-40 minutes, or until the crust is golden brown and the filling is firm and looks puffed. Cool before serving.

(adapted from Baking with Julia by Dorie Greenspan)
Plum Pizza with Caramelized Onions & Crispy Bacon

I like weird combinations. I think that plums on your pizza would qualify for that combo. I recently came across an article in Parents magazine, that suggested making dinner choices with fruit instead of vegetables as an alternative for those with picky eaters. When analyzing the antioxidant levels of different kinds of produce, the highest levels are actually found in fruit. I wasn't allowed to be a picky eater as a child, my Dad was the king of making us eat everything we were served. Sorry Dad! :) While I might have been less than enthused as a child, I am now able to enjoy almost everything. I did not get so lucky on the adventuresome eater husband train though. Mine is decidedly picky, but at least he will try most things once.
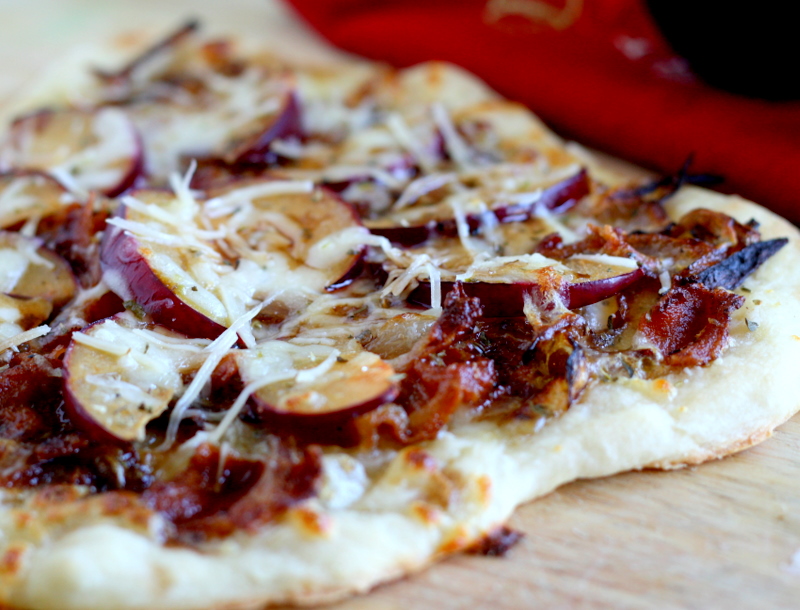
In the same Parents magazine I saw a recipe for pizza topped with plums and feta cheese, and it caught my eye. I decided to try my own version with what I had on hand, and came up with this Plum Pizza with Caramelized Onions & Crispy Bacon. I was going completely on faith with this one. With no idea how it would turn out, I was greatly surprised when it tasted fantastic. I didn't have any pizza dough on hand, so I just used some homemade whole wheat flax tortillas, which was quicker for lunch anyway. The pizza was baked on my pizza stone to get it nice and crispy, which is a must for me, I hate soggy pizza crust. After it came out of the oven, the final touch was to drizzle a tiny bit of balsamic vinegar over the toppings. Mmmm, it was tasty.
Of course, I had to make a plain cheese and bacon one for the finicky eater.

Boring, but still good :)
1 Tortillas (homemade or store bought)
Shredded mozzarella1 ripe plum, sliced
1 onion, sliced and caramelized
2 pieces of bacon, cooked crisp
Dried oregano
Salt, to taste
Balsamic Vinegar, to taste (optional)
For the onions: In a large heavy bottom pan, add some olive oil to cover the bottom and about 1 teaspoon of butter. When butter is simmering, add the sliced onions and stir to coat. Cook on medium high for 10 mins, stirring occasionally. Lower heat and continue to cook for about another 10 mins, stirring just when the onions start to stick to the pan, but not burn. If you stir too often the onions will not brown. You can add some sugar if needed to help the onions caramelize. When the onions are a deep caramel color, remove from heat and set aside.
Preheat oven to 500 degrees, if using a pizza stone put it in now to warm up. Place one tortilla on the pizza stone or cookie sheet, with no toppings, for 4-5 minutes. This will make sure the crust is crispy. Remove tortilla from the oven. Sprinkle with mozzarella cheese, then arrange sliced plums on top. Place onions and crumbled bacon on top of the plums, then sprinkle with some dried oregano and sea salt. Place pizza in oven and bake for about 5-7 minutes, until cheese is melted and golden. Remove from oven and let cool. If desired, garnish with some freshly grated Parmesan and a few drops of balsamic vinegar.
Using the tortilla crust is quick and easy, and using a traditional thin crust pizza dough would be even better. I will try that next time when I have more time.
(Inspired by Fruit Pizza, Parents Magazine, August 2010)
Poor Man's Stew or Doodleberry Soup?
I think my blogging experience is rubbing off on my son. My husband was trying to eat some cheese and crackers today, and my son walked up with his "camera" and said, "Wait, Dad.. put the cheese on the crackers like this, now let me take a picture." I guess the sight of me with camera in hand, taking an endless amount of pictures of the food I make, has left an impression in his little brain. We may have a little chef in the making. He was along side me again today while I prepared dinner for tonight. He had taken the leftover frozen vegetables and made his own "soup" at his little kitchen. He calls it Doodleberry Soup.
.

Being the loving mom that I am, when he asked if I would like to taste it, I had to agree. My stage face really came into play, because he had poured a copious amount of garlic powder and chili powder on top. While his version of Poor Man's Stew might need a little tweaking, mine is tried and true and completely satisfying.

The recipe was given to me by my mother-in-law, and it is similar to something my parents used to make called Hobo Stew. I typically make it in the winter, but decided there was no rule against making stew in the summer. It is called Poor Man's Stew, because it is made with ground beef rather than stew meat, which is quite a bit less expensive. It's a recipe that you can easily adapt to suit your own tastes.
 Poor Man’s Stew
1 lb. hamburger meat, cooked and drained
Season salt
2-3 Cups frozen vegetables (or 2 cans mixed vegetables, drained)
1 can whole new potatoes, drained and cut into bite sized pieces.
1 can red kidney beans, drained
4 small cans tomato sauce or 2 large cans
1 tablespoons ketchup
¼ cup picante sauce or salsa (optional)
1 chopped onion (optional)
1/2 tsp chili powder
1/2 tsp garlic powder
Salt and pepper to taste
water or beef broth (optional)
Brown the hamburger with some season salt, and drain off the grease. Place the meat in a large pot or crock pot. Add the vegetables, cut up potatoes, beans, tomato sauce, ketchup, onion, and spices. Depending on how thick you want it you can add a little water or beef broth to thin it down if desired. I usually add about a cup of water or broth. Cook on high for 4 hours, or low for 8 hours. The longer you let this simmer before eating, the better it will be. The flavors soak into the vegetables and it tastes even better.
You can do a lot of different variations with this recipe. I have used many different types of vegetables and beans. You can also play around with the proportions, it is a very forgiving recipe. You can even add some cooked elbow macaroni for a different variation. Taste and season as desired, I use less chili powder because my husband doesn't like spicy food. But you can add more to taste. This keeps very well for several days in the refrigerator, and tastes even better heated up the next day. We may have to change the name of this soup in our house, since my son will only refer to it as Doodleberry Soup now.

.
I present....Chef Cade...

and his Doodleberry Soup

Being the loving mom that I am, when he asked if I would like to taste it, I had to agree. My stage face really came into play, because he had poured a copious amount of garlic powder and chili powder on top. While his version of Poor Man's Stew might need a little tweaking, mine is tried and true and completely satisfying.


1 lb. hamburger meat, cooked and drained
Season salt
2-3 Cups frozen vegetables (or 2 cans mixed vegetables, drained)
1 can whole new potatoes, drained and cut into bite sized pieces.
1 can red kidney beans, drained
4 small cans tomato sauce or 2 large cans
1 tablespoons ketchup
¼ cup picante sauce or salsa (optional)
1 chopped onion (optional)
1/2 tsp chili powder
1/2 tsp garlic powder
Salt and pepper to taste
water or beef broth (optional)
Brown the hamburger with some season salt, and drain off the grease. Place the meat in a large pot or crock pot. Add the vegetables, cut up potatoes, beans, tomato sauce, ketchup, onion, and spices. Depending on how thick you want it you can add a little water or beef broth to thin it down if desired. I usually add about a cup of water or broth. Cook on high for 4 hours, or low for 8 hours. The longer you let this simmer before eating, the better it will be. The flavors soak into the vegetables and it tastes even better.
You can do a lot of different variations with this recipe. I have used many different types of vegetables and beans. You can also play around with the proportions, it is a very forgiving recipe. You can even add some cooked elbow macaroni for a different variation. Taste and season as desired, I use less chili powder because my husband doesn't like spicy food. But you can add more to taste. This keeps very well for several days in the refrigerator, and tastes even better heated up the next day. We may have to change the name of this soup in our house, since my son will only refer to it as Doodleberry Soup now.

Snickerdoodle Muffins

I had the motivation last night to decide I would make muffins for breakfast today. Probably due to the massive amounts of caffeine I drank before bed, bad idea. As a result, I didn't fall asleep until almost 3:00am. At least I had the foresight to measure all my dry ingredients out and have everything ready for this morning. Snickerdoodles are one of my favorite cookies, and I thought it would be fun to make a muffin version that is dipped in a cinnamon sugar mixture. They turned out nice and moist, with the same crunchy, crackle effect on top that the cookies have.

2 sticks butter, unsalted
1 Cup sugar
1 tsp vanilla extract
1 tsp almond extract
2 eggs
3/4 tsp baking soda
3/4 tsp baking powder
3/4 tsp cream of tartar
3/4 tsp ground nutmeg
1 1/4 Cup buttermilk
1 1/2 Cup all-purpose flour
3/4 Cup whole wheat pastry flour (or whole wheat flour)
1 Cup sugar mixed with 2 Tbsp cinnamon in a small bowl, for rolling
Pre-heat your oven to 500 degrees. Cream the butter and sugar together until soft. Add the vanilla and almond extracts. Add the eggs in one at a time, mixing after each one until incorporated. In a separate bowl, combine the flours, baking soda, baking powder, cream of tartar, and nutmeg.
Add the dry ingredients and the buttermilk alternately to the butter mixture, starting with the flour and ending with the flour. Scrape the sides of the bowl occasionally. Using an ice cream scoop, scoop out the batter and drop in the cinnamon sugar mixture. Sprinkle the sugar all over the batter, then drop into a greased muffin pan.
Lower your oven temperature to 375 degrees, and immediately bake the muffins for 18-20 mins, until the tops are golden. Muffins are done when a toothpick inserted into the center comes out clean. Do not over bake. Remove the pan and let the muffins cool in the pan for about 5 minutes. Carefully remove.
Tip: When you put muffins in a very hot oven and immediately drop the temperature, you help create the high peaks that make them attractive.

Source: adapted from culinary concoctions by peabody
Pulled Chicken Sandwiches

It was hot here today. The heat index was a sticky 103 degrees and needless to say I did not want to heat up my kitchen using the oven. The answer? My trusty ol' crockpot. I wanted to make pulled chicken sandwiches and didn't want a barbeque type sauce, so I used a spice rub that I had made the other day for a different recipe. While I may still tweak it a bit, it was good and all the family liked it. I served it on the little Hawaiian rolls and topped it with some melted cheese.

Pulled Chicken Sandwiches
3 Tbsp brown sugar
2 Tbsp salt
1 Tbsp paprika
1 1/2 tsp garlic powder
1/2 tsp fresh ground pepper
1/4 tsp dry mustard
1/8 tsp cinnamon
4 Chicken breasts
1 Cup chicken broth
Rolls
Shredded cheddar cheese
Mix all of the spice ingredients together in a small bowl to make the rub. Sprinkle 2-3 tablespoons of the rub over 4 chicken breasts, and rub in. Put the chicken broth in the crockpot, followed by the chicken breasts. Sprinkle about another 1-2 tablespoons of the rub into the crockpot.
Cook on high for 2 hours, or low for 4 hours. Each crockpot cooks differently, so check the chicken periodically to gauge how much more time is needed. Don't remove the lid until you think the chicken is done, because this will cause the cooking temperature to drop. When the chicken is done, remove from the crockpot and shred with a fork.
Remove most of the chicken broth from the crockpot. Put the shredded chicken back into the crockpot and add enough of the chicken broth back to make it your desired consistency. Place some of the shredded chicken on a roll, and top with shredded cheese. Put the rolls on a plate under the oven broiler for a few minutes until the cheese is melted. Serve with your favorite sides and enjoy.
Tip: This rub will make more than you need, it saves well and can be used for other recipes.

Candied Saltines

Today my son begged me to make him some 'cracker candy'. This is a treat that I make him every now and then, that he absolutely loves. It always ends up with his little face and hands smeared in chocolate, and me holding him at arms length while I propel him toward the bathroom to clean up.
It's so addictive that the mess is worth it. The crunchy saltiness of the crackers pair really well with the sticky sweetness of the homemade toffee sauce and melted chocolate. Try to eat just one. I bet you can't.
Candied Saltines
24 saltine crackers
1/2 Cup (1 stick) of butter
1/2 Cup brown sugar
3/4 Cup semi-sweet chocolate chips
Heat your oven to 400 degrees. Place the crackers in rows inside a quarter sheet pan. In a saucepan melt the stick of butter, then add the brown sugar. Bring the mixture to a full boil, and allow to boil for 4 minutes, stirring constantly. It is important to keep stirring so your mixture doesn't burn. Now pour the mixture over the saltines and spread around so the crackers are evenly covered. The mixture will be thick. Put the pan in the oven for 3-4 minutes. Remove the pan and sprinkle the chocolate chips over the caramel mixture. Let sit for a few minutes so the chocolate begins to melt, then spread the chocolate evenly over the surface. Place the pan in the freezer to chill completely. When ready, take the pan out and either cut the candy into pieces, or break it into chunky pieces.
Tip: You can double the recipe to fit a half sheet pan if making for a large gathering. For extra variety you can sprinkle a topping over the chocolate before placing the the freezer. I have tried peanuts, almonds, sunflower seeds, m&m's, etc.

Cinnamon Banana Pudding

One of my favorite desserts growing up was my moms banana pudding. It was simple and very good. We didn't have nilla wafers or graham crackers in Wales, so she used a type of cookie they have called Digestives. While the name may not sound very appetizing and might conjure up images of things of the digestive nature, these British cookies are mysteriously addicting. They are sort of similar to a round graham cracker, but thicker and more buttery. They hold up well under the pudding, and don't get the soggy texture like nilla wafers do. She also kept it simple by not adding any whipped topping...just layers of cookies, bananas, and pudding...with a sprinkle of nutmeg on top.
I decided to recreate her pudding last night, but had to use good ol' American nilla wafers since I can't buy Digestives here. Now don't get me wrong, there's nothing wrong with nilla wafers, I just prefer the cookies. Half way through making the pudding, I had the idea to add cinnamon to the pudding and make it into cinnamon pudding. I also used turbinado sugar instead of white sugar, to give it that brown sugar taste. The result was sooooo good. I could have eaten the whole pan of warm cinnamon pudding by itself.

3/4 Cup turbinado sugar (you can use white or brown sugar too)
3 Tbsp organic cornstarch
3 Cups milk
2 beaten eggs
1/4 tsp cinnamon
1 1/2 tsp pure vanilla extract
1 Tbsp butter, unsalted
4 large bananas, sliced
Nilla wafers, graham crackers, or cookie of choice
In a heavy medium saucepan combine the sugar, cornstarch, and cinnamon. Slowly whisk in the milk and cook over medium heat until bubbly, stirring constantly. Cook and stir for 2 more minutes, then remove from heat. Gradually stir one cup of the milk mixture into the beaten eggs. Now add the egg mixture to the milk mixture in the saucepan, and cook until almost bubbly, but do not boil. Reduce heat. Cook and stir for 2 more minutes. Remove from heat.
Add the tablespoon of butter, and the vanilla extract and stir. In an 8x8 baking dish (or similar size) layer some of the cookies until the bottom is covered. Place a layer of banana slices over the cookies. Pour a layer of pudding over the bananas. Continue the layer of cookies, bananas, and pudding until you reach the top of your dish. Sprinkle a little nutmeg over the top of the pudding, if desired. You can serve it warm, or cover with plastic wrap and refrigerate until ready to eat. Yum.

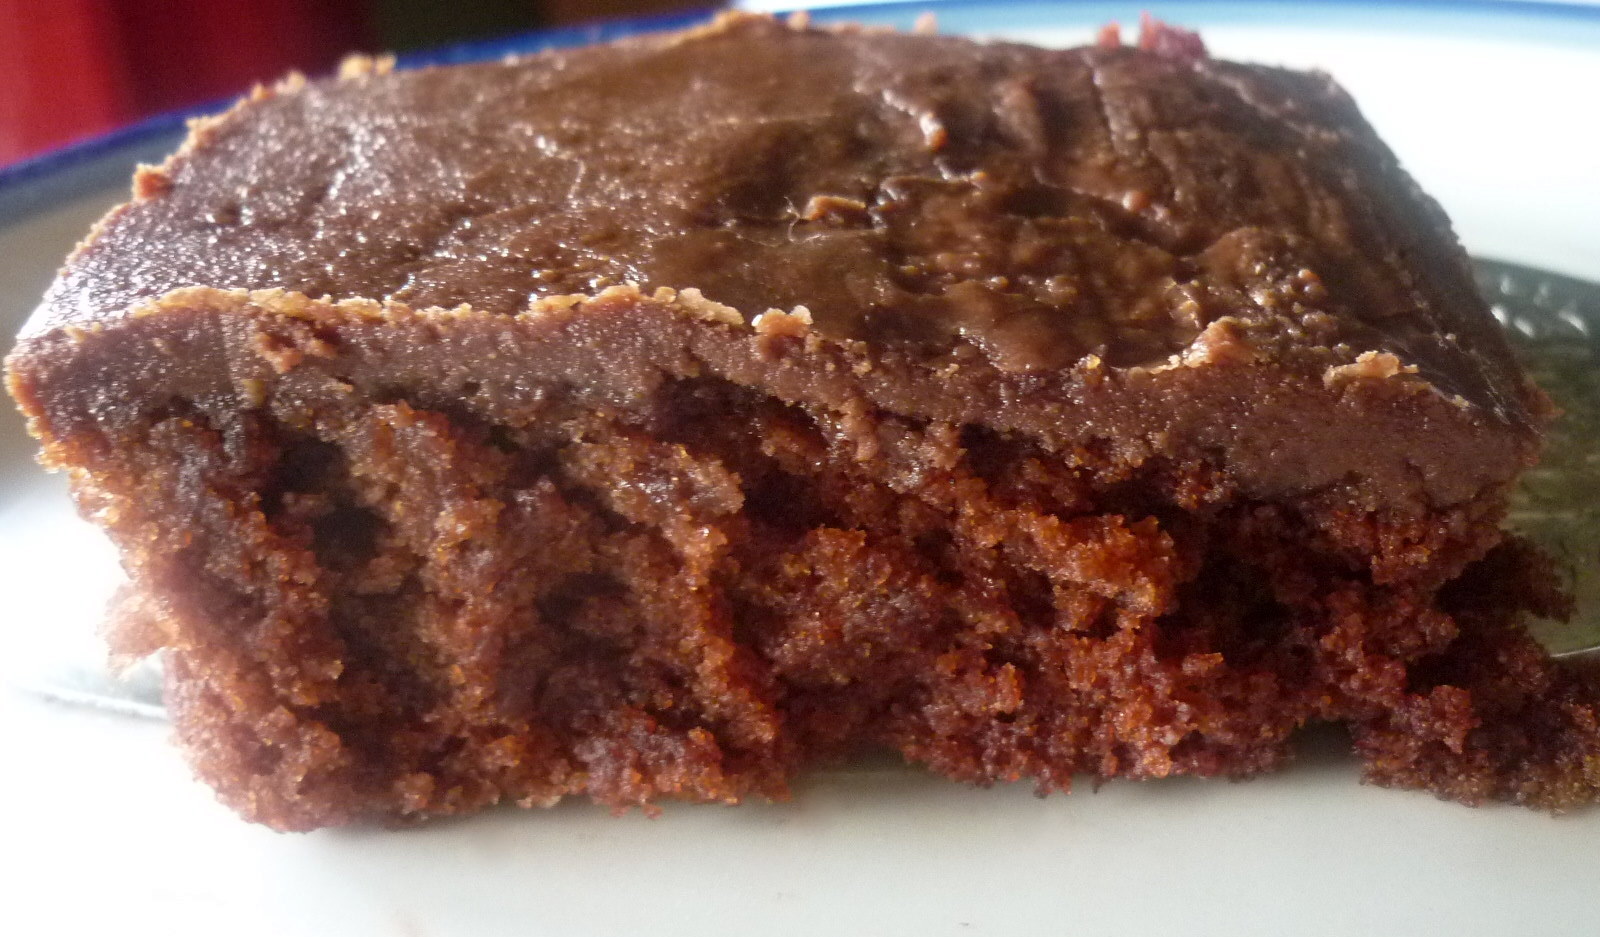
Cheap Chocolate Cake

better the next day.

Cheap Chocolate Cake
3 Cups all-purpose flour (this cake works great with whole wheat pastry flour)
2 Cups sugar
1/3 Cup cocoa
1 tsp salt
2 tsp baking soda
3/4 cups oil
2 Tbsp white vinegar
2 tsp vanilla
2 Cups hot water
For the Cake:

For the Glaze:
1/3 Cup milk (any fat percentage works fine)
1 Cup sugar
3 Tbsp cocoa
1 tsp pure vanilla extract (added at the end)
In a small saucepan bring the milk to a simmer, then add the sugar and cocoa. Bring to a boil and cook for 2 minutes at a full boil, stirring frequently. Remove from heat and let cool for a few minutes. After glaze has cooled for a few minutes, whisk in the vanilla. Now use a fork to poke holes in the surface of the entire cake. Pour the glaze over the cake, and spread evenly with a spoon, making sure the whole surface is covered. Let cool until the glaze has hardened. It will become smooth and hard to the touch once cooled. This hardening process may take just a few minutes, or up to an hour. So make sure you keep an eye on the glaze while it is cooling in the pan. You don't want it to set up in the pan, and not be able to pour it over the cake. Serve and enjoy! This cake keeps very well for several days...if it lasts that long. :)
Rustic Peach Tart

I walked into the kitchen today to find my baking cupboard emptied, and containers of flour and sugar lining my counter. Perched on the edge of a chair, my 3 year old son is mixing up a mysterious concoction, proudly grinning at me as I catch him red handed. "What are you doing?" I ask, he replies, "Makin sumtin". I find it hard to get after him, so I simply join in and we end up putting together a peach tart. Well...it was mostly me, while he continued his own pre-schoolesque recipe next to me. I left the skin on the peaches because I like the way it looks, but you can remove the skin too.

Crust:
11/3 Cups Whole Wheat Pastry Flour (or whole wheat flour)
1/3 Cup Turbinado Sugar
6 Tbsp Chilled Butter, cut into pieces
1 Egg, plus 1 Egg Yolk
1/4 tsp pure vanilla extract
Filling:
3 Large Peaches, cut into slices
1/4 tsp Cinnamon
1/4 tsp Nutmeg
Turbinado sugar to sprinkle
Sea salt to sprinkle
For the pastry: Combine the flour, sugar, and butter in a bowl. Work it together with your fingers or a fork, until it forms coarse crumbs. Add the egg, extra egg yolk, and vanilla. Mix together until a smooth ball forms. Wrap in plastic wrap and chill in the freezer for about 20 minutes.
For the filling: Place the sliced peaches in a bowl, sprinkle cinnamon and nutmeg on top and lightly toss. Place in the refrigerator until dough is chilled. Preheat oven to 400 degrees.
Once chilled, remove the dough from the freezer and unwrap. Place a sheet of parchment paper on the counter. Place dough on the parchment paper, with the plastic wrap on top of the dough. Roll dough out between the parchment paper and plastic wrap, to a circle about 12 to 13 inches. Gently peel off the plastic wrap.
Using the parchment paper, flip the dough over into an un-greased ovenproof skillet, or an 8 to 9 inch baking pan. Let it settle into the pan, but don't remove the paper yet. Press the pastry onto the bottom and sides of the pan. Now gently peel away the parchment paper. If the dough tears, just press the tears together. By this time my dough had softened up a little too much, so I put the pan into the freezer for about 5 minutes to make it easier to work with.
Arrange the peach slices inside the pan, and sprinkle with a couple tablespoons of raw sugar, and a little sea salt if desired. Fold the pastry edges in and over the fruit. Bake for about 40 minutes, or until the fruit is starting to get golden brown and the pastry is crisp. Serve plain or with a dollop of freshly whipped cream.

Berry Buttermilk Cake with Whole Grains

I did not have a fun day today. My cat threw up the remains of her meal on my new rug, my husband was a self proclaimed cripple, laid up in bed, and my son sprinkled piles of flour from my living room to his bedroom. He was baking a cake, so he said.
Once I finally got some semblance of order established, I decided I needed a treat to relax. I bought some buttermilk when I went grocery shopping because I knew I wanted to try this buttermilk cake, and I had about a cup of blueberries with "bake me" written over their tiny blue faces.
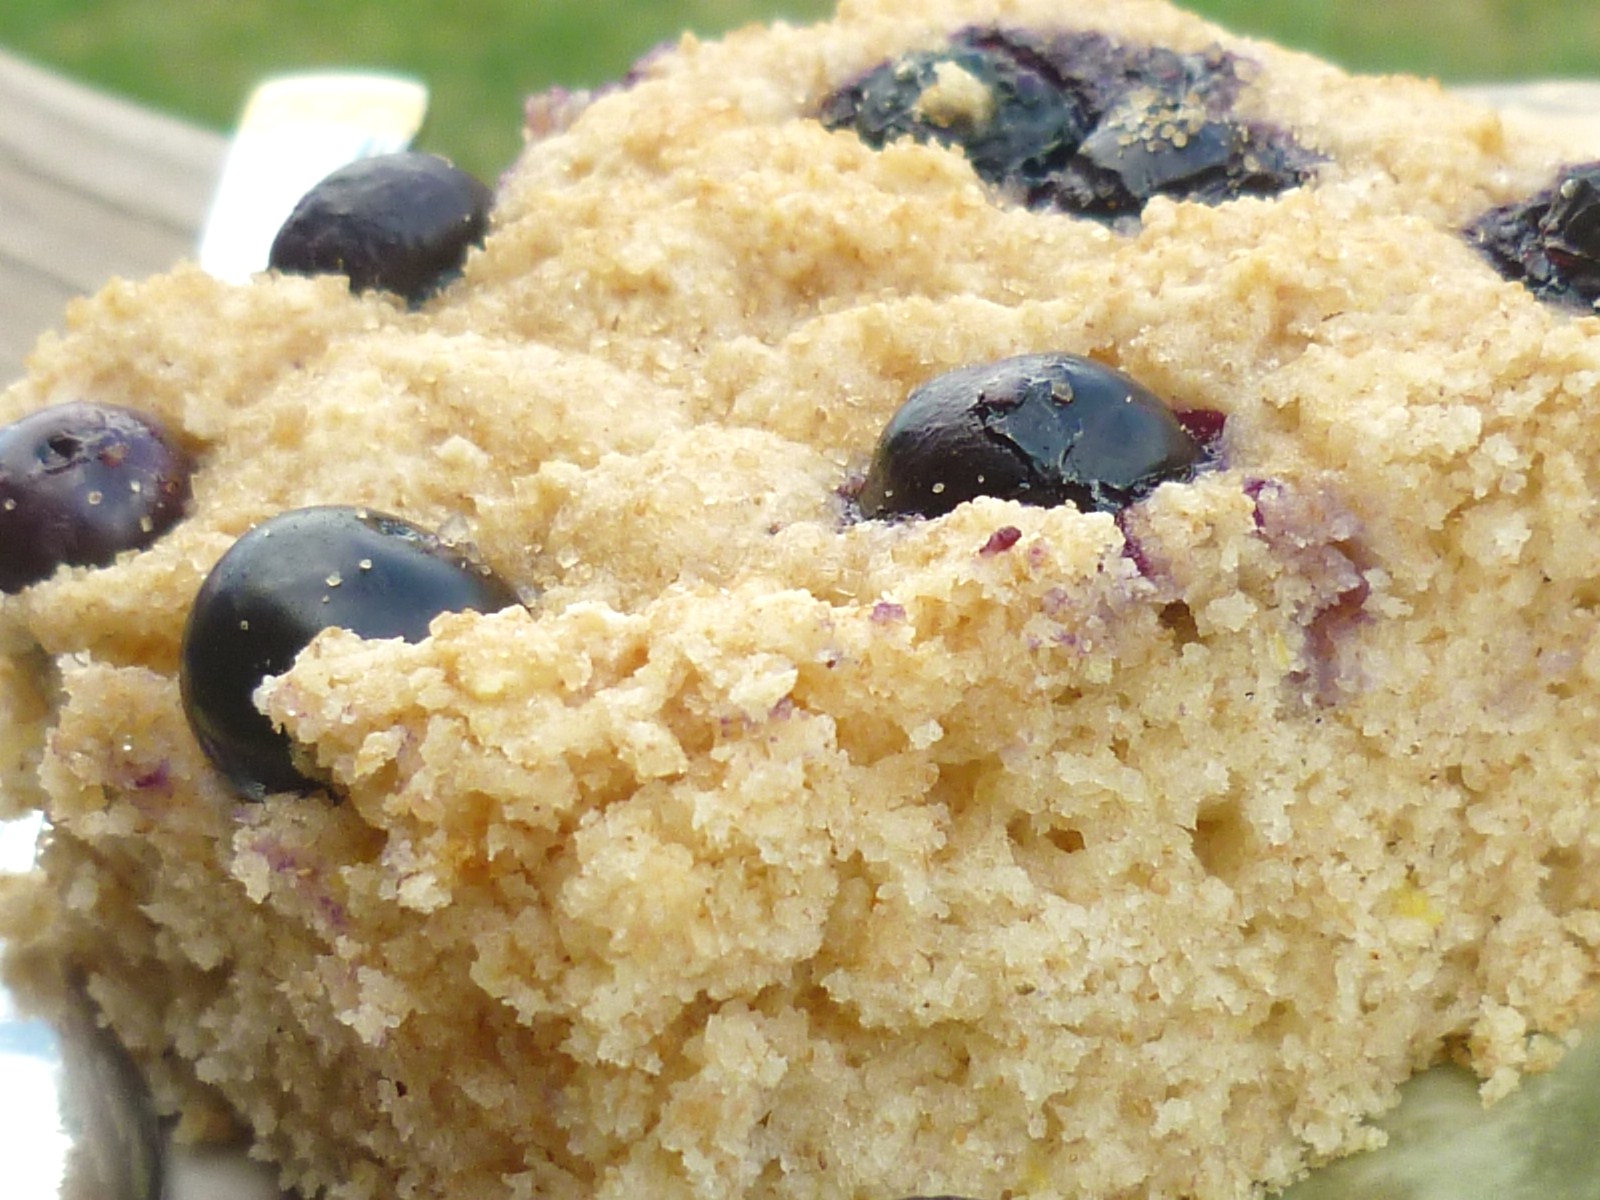
So I listened to their unspoken message and got to work. By now you may have noticed I try to add in some whole wheat pastry flour whenever I can, and this recipe was no exception. It turned out pretty good, if only a tiny bit dry. I think my oven runs hot so will try reducing the baking time next time.
This isn't a very sweet cake, which is good when you're trying to be good, and the whole wheat flour adds extra fiber and nutrition. The blueberries scattered on top added a nice juiciness to each bite, and would even be good folded into the batter. If you don't have blueberries, any kind of berry would work well instead.

1 1/2 cups all-purpose flour
1 cup whole wheat pastry flour
1 Tbsp baking powder
1/2 cup sugar (turbinado or regular)
1/4 tsp ground nutmeg
2 eggs
1 cup buttermilk
4 Tbsp butter, melted
1 tsp pure vanilla extract
1 tsp grated lemon zest
1 cup fresh blueberries (or any berry)
3 Tbsp raw turbinado sugar
Preheat oven to 400 degrees. Grease and flour a 12 by 8 inch pan (or similar size) with sides at least 2 inches high. In a large bowl sift the flours, baking powder, sugar and nutmeg. In a smaller bowl whisk the eggs until fluffy. Add the buttermilk, butter, lemon zest and vanilla to the eggs. Mix together well. Pour the wet mixture into the dry ingredients, and gently mix together just until combined.
Do not over mix the batter or the cake will be tough. Spoon the batter into the pan, spreading it so that it reaches all sides. Scatter the half of the blueberries on top, pressing them lightly into the batter. Then scatter the rest of the blueberries on top and sprinkled with the raw sugar. Bake for 20-25 minutes or until a toothpick inserted into the center comes out clean. Let cool in the pan before cutting into squares.
(adapted from Apples for Jam
Subscribe to:
Posts (Atom)


