Orange Pomegranate Crostata November DB Challenge
November 29, 2010
The 2010 November Daring Bakers’ challenge was hosted by Simona of briciole. She chose to challenge Daring Bakers’ to make pasta frolla for a crostata. She used her own experience as a source, as well as information from Pellegrino Artusi’s Science in the Kitchen and the Art of Eating Well.
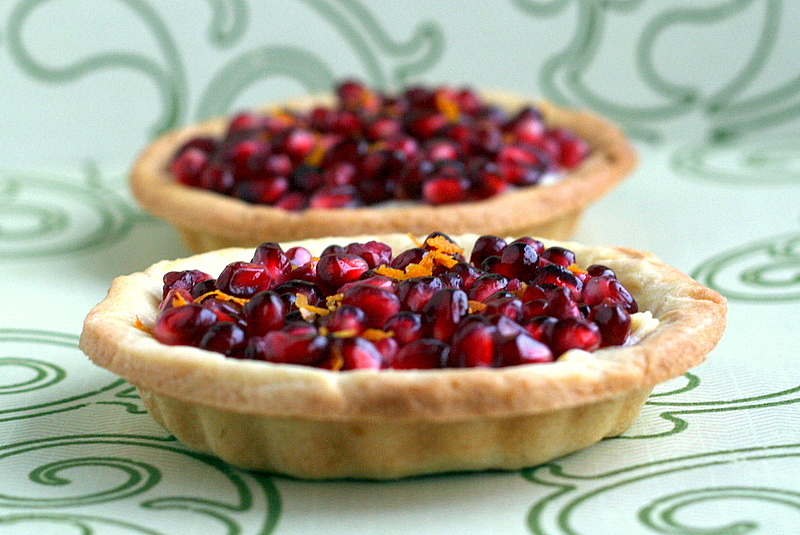
I am late with my Daring Bakers Challenge post this month; throwing a birthday party and Thanksgiving cooking left me with little time to post on the 27th. I finally had time to finish it though, and the challenge this month was another opportunity for to me to try something new and fun. Crostata (tart) is an Italian dessert, with a base of pasta frolla (sweet short crust pastry) and can be filled with whatever you please. Since Thanksgiving was just around the corner, I thought to do a pumpkin filled tart, but I had some pomegranates sitting in my refrigerator and decided to whip up this Orange Pomegranate Tart. I love pomegranates and it's definitely a bonus that they are so good for you!
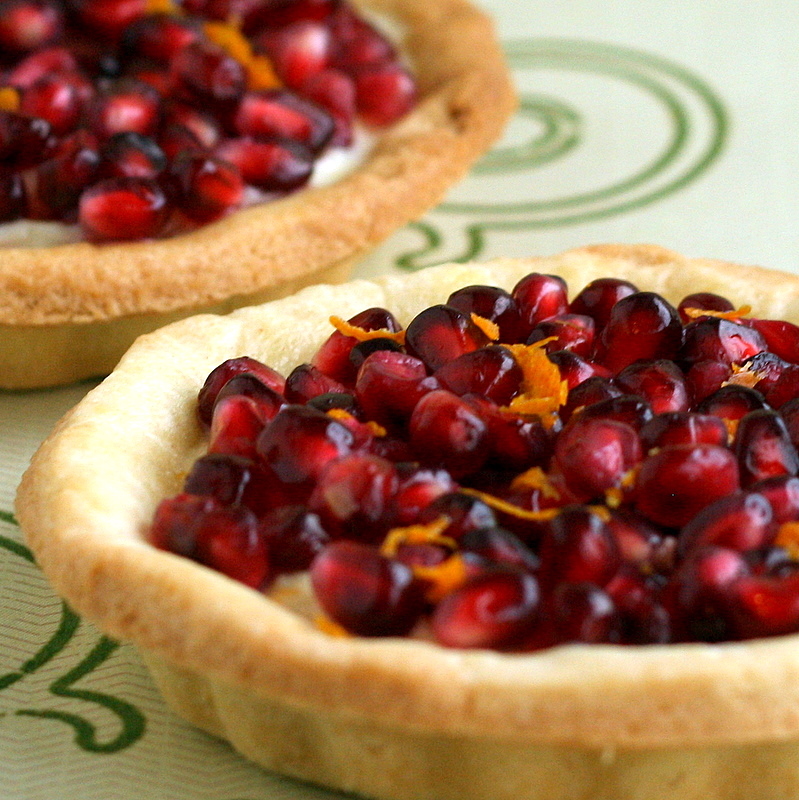
I have never made pastry cream before, so this was an opportunity for me to gain some experience in something new, and while the pastry cream was good, I think next time I would try an orange curd. I did not have a large tart pan, so I made little tartlets, then filled them with the orange pastry cream and sprinkled with pomegranate arils. I always like to make mini sized desserts, it tricks my brain into thinking that I'm eating an acceptable amount of calories...never mind that I usually eat two of them:)
Orange Pomegranate Tart
Printable Recipes
Orange Pastry Cream
1 cup milk
1/4 cup sugar
finely grated peel from one orange
1/8 teaspoon vanilla (optional)
3 large egg yolks
2 tablespoons all-purpose flour
1 tablespoon unsalted butter, room temperature
In a small bowl, whisk the egg yolks together with 2 tablespoons of the sugar, and the flour until well incorporated. Set aside. In a small, heavy-bottomed pan, place the milk, orange zest, and the other 2 tablespoons of sugar, and heat until barely boiling. Remove from heat and pour half of the milk mixture into the yolk mixture, whisking until combined. Pour the egg mixture back into the saucepan and put on medium-low heat, whisking constantly until mixture is thick (about 2-3 minutes). Remove from heat and add the butter, stirring until melted. If desired, press the pastry cream through a sieve over a bowl. Store in the refrigerator with plastic wrap pressed on the surface for up to 3 days.
Pasta Frolla (sweet short crust)
1/2 c. minus 1 tablespoon superfine sugar, or a scant 3/4 cup of powdered sugar
1 and 3/4 cup unbleached all-purpose flour
a pinch of salt
1 stick cold unsalted butter, cut into small pieces
grated zest of half a lemon
1 large egg and 1 large egg yolk, lightly beaten in a small bowl
In a large bowl, whisk together sugar, flour and salt. Rub or cut the butter into the flour until the mixture has the consistency of coarse crumbs. You can do this in the bowl or on your work surface, using your fingertips or a fork.
Make a well in the center of the mounded flour and butter mixture and pour the beaten eggs into it. Add the lemon zest to your flour/butter/egg mixture. Use a fork to incorporate the liquid into the solid ingredients, and then use your fingertips. Knead lightly just until the dough comes together into a ball.
Shape the dough into a flat disk and wrap in plastic wrap. Place the dough in the refrigerator and chill for at least two hours. You can also refrigerate the dough overnight.
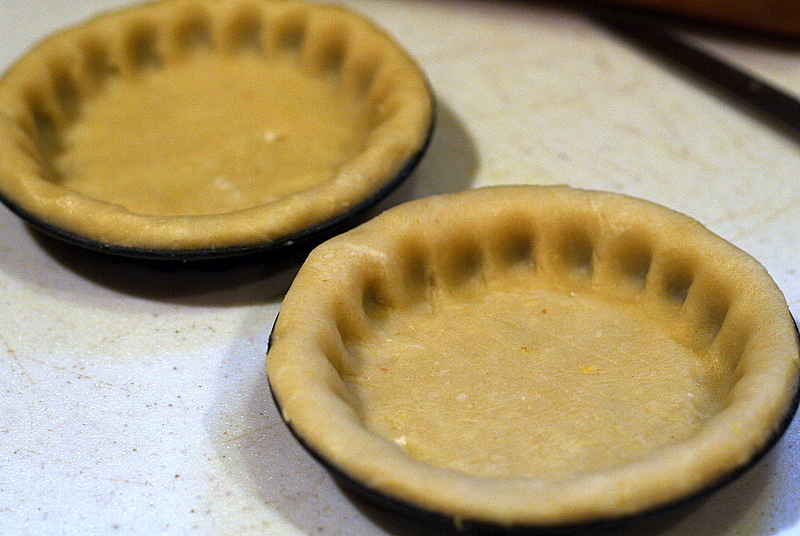
Heat the oven to 350F. Take the pasta frolla out of the fridge, unwrap it, but keep the dough loosely covered. Roll the crostata dough out between the plastic wrap, this prevents the dough from sticking to your surface without using flour, and makes it easier to transfer to your tart pan.
If the dough is very firm, start by pressing the dough with the rolling pin from the middle to each end, moving the rolling pin by a pin's width each time; turn the dough 180 degrees and repeat; when it softens, start rolling. Roll the dough into a circle about 1/8th inch thick. Now flip the dough over the pan, centering it, and delicately press it all around so the corners are well covered. Peel away the plastic wrap. Trim the excess dough hanging over the edges of the pan. Press the remaining dough around the border into the sides of the pan making sure the border is an even thickness all the way around.
Remove the crostata shell from the tart pan, and place on a serving plate. Fill the cooled shell with the prepared pastry cream, then sprinkle the pomegranate arils over the top. Enjoy!
Amber
Superhero Birthday Party
November 22, 2010
I have a superhero obsessed son - this is his latest phase. Before that it was race car mania, which had an impressive run of at least two years, before the superpowers of certain caped crusaders caught the attention of his sponge-like mind. Don't get me wrong, he still loves his cars, and has more hot wheels than any kid you will ever meet. Seriously, he has over 1000 (a lucky hand me down, not bought by us!)
Realizing that another birthday was fast approaching, I used my own mommy super powers (mothers intuition, eyes in the back of my head, and go-go-gadget arms, ) to plan a superhero themed birthday party for him. We had already been informed from our super hero in training, that he wanted his party at Chuck E. Cheese, so I worked with that and planned around what that kid-crazy-party infested place didn't provide. That left invitations, the cake, and goody bags. I scoured the internet for inspiration and put together a frankenstein hodge podge of party ideas. Several free printables later, along with some scrapbook paper, a little glue, and some imagination, I had the beginnings of a really cute theme.
The Superhero Invitations
These were made by cutting out the images I wanted, then typing up an invitation and gluing the images where I wanted them. This gave me my "prototype". I took this copy to Kinko's and made high quality color copies for the finished product. Fold the invitations up letter style, put them in an envelope marked TOP SECRET, and you have yourself a cute superhero party invitation.
The Superhero Cupcake Stand
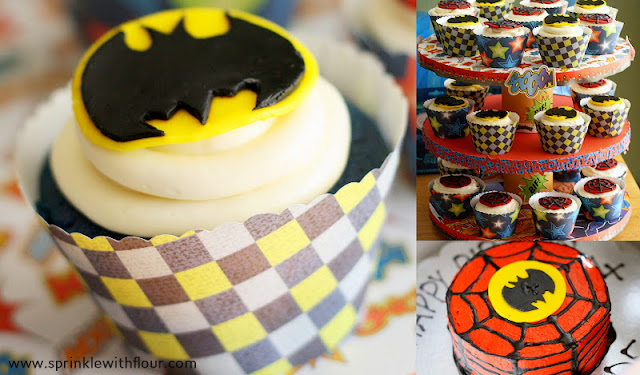
I ordered a superhero themed scrapbook set that was on clearance at Oriental Trading, along with the clearanced superhero ribbon. I then covered my homemade cupcake stand with the superhero paper and ribbon.
The Cupcake Wrappers
I bought some scrapbook paper from Hobby Lobby that would work with the theme, and made these superhero cupcake wrappers. I used this printable cupcake wrapper template from Skip To My Lou.
The Superhero Cupcakes
I made these Blue Velvet cupcakes from Sprinkle Bakes, which are just red velvet cupcakes colored blue instead of red, and iced with yummy cream cheese frosting. Then I made superhero themed sugar paste cake toppers to place on top. Find the Blue Velvet recipe below.
Blue Velvet Cupcakes
Printable Recipe
2 cups sugar
2 sticks butter, softened
2 eggs
1 Tbs. cocoa powder
1 Tbs. Wilton food coloring gel in Royal Blue
Wilton food coloring gel in Violet – stick a toothpick in the bottle and use that amount
a teaspoon or two of water
2 1/2 cups cake flour
1 tsp. salt
1 cup buttermilk
1 tsp. vanilla
1/2 tsp. baking soda
1 Tbs. vinegar
Heat the oven to 350 degrees. Put cupcake liners in the cupcake pans.
In a mixer bowl, cream the butter and sugar. Add the eggs, one at a time, mixing well. In a small bowl, mix the cocoa, food coloring gel and water together to form a paste. Add to the ingredients in the mixer bowl and blend well. Stir the flour and salt together and add to the wet ingredients, alternating with the buttermilk. Mix well. Blend in the vanilla. In a small bowl, combine the baking soda and vinegar and then add that to the other ingredients in the mixer.
Fill the cupcake liners with batter, about 2/3 of the way full. The batter will be thick. Bake for 25-30 minutes or until a toothpick comes out clean. Cool completely before frosting. Makes 24 cupcakes.
Cream Cheese Frosting
1 pound cream cheese, softened
4 cups sifted confectioners’ sugar
1 cup unsalted butter softened
1 teaspoon vanilla extract
1 teaspoon lemon extract (optional)
Mix cream cheese with butter until smooth. Add extracts. Slowly add sugar and blend until light and fluffy! Use a piping bag with a round #8 tip to create fluffy cupcake tops!
The Birthday Boy's Cake
I used the same Blue Velvet recipe as the cupcakes, and iced with cream cheese frosting and royal icing. The cake topper is made from sugar paste.
The Superhero Masks
These masks are so simple to make, with some felt and an elastic string. I used this printable as a template and embellished the masks with felt stars. Sorry I forgot to take a picture of my own, but you can see what they look like here.
The Superhero Goody Bags
These masks are so simple to make, with some felt and an elastic string. I used this printable as a template and embellished the masks with felt stars. Sorry I forgot to take a picture of my own, but you can see what they look like here.
The Superhero Goody Bags
A quick trip to the dollar store gave me most of what I needed to customize these bags. I got some Marvel Superhero matching cards for a dollar a piece, and a container of small play dough pots for a dollar. I used the same printable superhero images that I used for the invitations, some scrapbook paper, and superhero ribbon to make these themed favors.
I had a lot of fun with this birthday theme, but am glad all of the work is over! The party was a success, and my little super hero loved his cake. Now I only have about 350 days of rest before the next one:) Thanks for stopping by!
Amber
Baked Brie with Brown Sugar & Cranberries
November 10, 2010
This month has turned out to be a hectic month, leaving me little time to post recipes. Between Halloween parties, trick-or-treating, planning my sons birthday party next week, and the upcoming Thanksgiving holiday, I haven't had much time for my poor little blog. To make up for my shameful inattention, I am posting this yummy recipe I found in one of my favorite magazines, Phyllis Hoffman Celebrate Fall. Baked Brie with Brown Sugar & Cranberries.
I actually had made up the pie crust over a week ago, and put it in the freezer for when I needed it. This is my favorite pie crust recipe, it is super flaky, tender, and you can make several at once, then just pop them in the freezer for whenever you need them. I think the freezing part gives it the extra flakiness. My mom always used ice-water to make her pie crust, and I think the freezing technique of this recipe produces similar results.
If you have never made your own pie crust, I really encourage you to try this one. You can find a great step by step tutorial for this recipe here, done by The Pioneer Woman. It is so easy to make, and with just a little practice you can be a pie-crust-making-queen:) Crust making can be intimidating, but it really isn't hard; as long as you don't over work your dough, you'll have great results. Try it!
Crust: (Makes 3 single layer pie crusts)
1 1/2 cups vegetable shortening (Crisco, or I use Spectrum non-hydrogenated shortening)
3 cups all-purpose flour
1 whole egg
5 Tbsp ice-cold water
1 Tbsp white vinegar
1 tsp salt
Baked Brie
1 (13.2 oz) Brie round
2 Tbsp brown sugar
1/8 cup dried cranberries
1 egg, lightly beaten
In a large bowl, with a pastry cutter or a fork, gradually work the shortening into the flour until it resembles a coarse meal. In a small bowl, beat an egg with a fork and then pour it into the flour/shortening mixture. Add 5 tablespoons of ice water, 1 tablespoon of white vinegar and 1 teaspoon of salt. Stir together gently until all of the ingredients are incorporated.
Separate the dough into 3 evenly sized balls of dough, then place each ball into a large Ziploc bag. Use a rolling pin to slightly flatten each ball of dough (about ½ inch thick). This makes it easier to roll later. Seal the bags and place them in the freezer until you need them. If you are using the dough right away, it still needs to chill for about 20 minutes in the freezer.
When ready to use the frozen dough, remove from the freezer and allow to thaw for 15 minutes. Lightly flour your surface and roll the dough. Start at the center and work your way out, in long even strokes. If the dough is too moist, sprinkle some flour over the top. If the dough sticks to the counter, use a metal spatula to carefully scrape it up, flip it over and continue rolling into a 14 inch circle. Cut off a 2 1/2 inch strip of dough, and using a small leaf shaped cookie cutter, cut out a few leaves from the strip.
Lift the dough carefully from the surface of the counter onto a baking sheet. Slice the rind off the top of the brie, and place the cheese in the center of the dough. Sprinkle the cheese with brown sugar and top with cranberries. Fold the edges of the dough up and over the cheese. Top with the leaf cutouts. Brush the beaten egg over the piecrust. Place in a 400F oven, and bake for 15-20 minutes or until golden. Serve with fruit. Enjoy!
Subscribe to:
Posts (Atom)


