
Peanut Butter Cup Ice Cream Pie
.jpg)
I love magic shell ice cream topping. I don't love the ingredient list, so after reading what was actually in it, I decided that I could easily make my own magic shell topping. So I grabbed a few peanut butter cups and melted them with a little coconut oil, and was very pleased with the results. The experiment actually succeeded and had me rubbing my hands together - like an evil villain - anticipating all of the frozen concoctions that could be smothered in this chocolate-peanut butter goodness.
I went with an ice cream pie made with classic vanilla ice cream, and dressed it up with an oreo-pretzel crust, the peanut butter chocolate shell, and peanut butter cup halves. The crust was a complete accident, I had originally bought a pre-made oreo crust (I was being lazy), and in all my graceful glory, I dropped it in the sink. Watching my time-saver crust laying in sad, broken pieces, I realized I would have to start from scratch. So I crushed some oreo's, and at the last second threw in some crushed pretzels, and made a choco-pretzel fusion. It turned out really good, and will be something I will definitely try again.
Peanut Butter Cup Ice Cream Pie
Pie crust:
1 cup crushed oreo cookies (without icing)
1 cup finely crushed pretzels
1/2 cup melted butter
1/8 cup brown sugar
Peanut butter shell topping:
8 peanut butter cups
2 oz expeller pressed coconut oil
Ice Cream:
1 1/2 cups heavy whipping cream
1 1/2 cups milk
2/3 cup sugar
1 tsp vanilla
5-6 extra peanut butter cups for garnish
For the Crust: In a large bowl, combine the crushed oreo cookie crumbs, crushed pretzels, brown sugar, and melted butter. Stir until well combined. Press the crumbs into the bottom and sides an 8-inch pie dish, then bake at 350F for 10-12 minutes. Remove from oven and cool completely.
.jpg)
For the Peanut Butter Shell Topping: In a small microwaveable bowl, place the peanut butter cups and the coconut oil. Microwave on low in 10 second intervals, stirring in between, until the peanut butter cups and oil have melted. Stir to remove any lumps. Set aside.
.jpg)
For the Ice Cream: Combine the cream, milk, sugar, and vanilla, then pour into an electric ice cream maker. Make according to manufacturers instructions. When then pie shell has cooled, spread half of the ice cream into the pie shell. Use a spoon to gently spread the ice cream until the bottom of the pie shell is covered.
.jpg)
Drizzle half of the peanut butter shell topping, onto the layer of ice cream.
.jpg)
Spread the remaining ice cream onto the peanut butter topping, using a spoon to spread evenly. Drizzle the remaining peanut butter shell topping over the ice cream. Cut additional peanut butter cups in half, and place them around the edges of the pie.
.jpg)
Honey Orange Rosemary Ice Cream
.jpg)
I bought an ice cream maker last year, mostly because my family are ice cream fiends, and partly because the fresh taste of homemade ice cream is so much better than store bought. I also like to avoid the questionable additives that are found in the store bought variety. Have you ever read the ingredient list on a carton of ice cream? Scary. Since we brought home our machine, the potential has never really been explored, making plain vanilla most of the time. There's nothing wrong with vanilla, I love the simplicity and richness in the pure vanilla flavor, but sometimes I like to explore outside of the box.
You may remember reading of my affinity for killing any living plant that has the misfortune of coming home with me. Because of this, I usually pass by the displays of pretty potted flowers, and lush houseplants, thinking to keep the poor plants safe from my life-sucking-anti-green-thumb. However, my good intentions went to the wind, when I passed a row of little rosemary plants outside of a store. They were on clearance marked down to a dollar, and since I love rosemary, I thought I'd give plant nurturing one more try. I'm glad I did! I'm proud to say my plant is still green, and going strong nearly 2 months later. There's something about using my own fresh rosemary in dishes, that makes me feel good. This little plant has found it's way into chicken dishes, pork, marinades, eggs, even lemonade. I feel like he is a true member of the family now :) You are wondering right now if this crazy girl actually talks to her plant, aren't you?
When deciding to make some ice cream the other day, I knew I wanted to try something different, and my eyes fell to my plant. I knew I loved rosemary used in a sweet way, from the Blackberry Rosemary Lemonade I had made, and decided to give it a shot in ice cream. I infused the cream with rosemary and orange, and sweetened it with honey and a little sugar. This may be my new favorite flavor. With a rich honey flavor, and subtle hints of rosemary and orange, this was so good.
.jpg)
.jpg)
Honey Orange Rosemary Ice Cream
2 cups heavy whipping cream
1 cup whole milk
1/2 cup honey
1/4 cup sugar
the rind of half an orange
2 Tbsp freshly squeezed orange juice
1 1/2 sprigs rosemary
Slice an orange in half, and using a sharp knife slice the orange rind from one of the halves. Try to slice off only the orange rind, with as little of the white membrane as possible. In a medium saucepan over medium heat, bring the milk and cream to a simmer. Add the honey and sugar, and stir until dissolved. Add the orange rind and rosemary sprigs, then remove from heat and let steep for 15-20 minutes, or until you reach your desired taste. Remove the rosemary sprigs and orange rind, then place the milk mixture in the refrigerator or freezer until chilled. Once the cream mixture has chilled, add the freshly squeezed orange juice and stir to mix. Pour the cream into your ice cream container and make according to your machine's directions. Then, place the ice cream in a container, cover, and put in the freezer until firm. Serve and enjoy!
.jpg)
Creamy Beef Linguine
.jpg)
I recently came to the conclusion that I am truly immersed in mommyhood, when the success of my dinner is determined by my 3 year old asking for his third helping of dinner. Some women may hold their breath and sneak quick peaks at their men, trying to gauge by their expression if they like dinner or not; Not I. With the picky palate of a 3 year old, success is when he eats more than 3 bites of the food I painstakingly - or sometimes sloppily - prepared for him. Of course, I have learned to keep my eyes on my own plate of food, for if the little prince even suspects that I am watching him...dinner is over. So what was it that a preschooler embraced so heartily? Creamy Beef Linguine...or worms as the kid called it.
Dinner was the result of my husband asking for some kind of pasta, because he was tired of plain meat, and me rummaging through my pantry to see what I could throw together. I felt sort of like a witch cooking a mysterious brew over a cauldron - minus the ugly wart and pointy hat - with all the odds and ends I threw in. It turned out pretty tasty though, something that I would even heat up and eat leftovers of.
Creamy Beef Linguine
1 1/2 cup milk
3/4 cup beef or chicken broth
2 Tbsp butter
1/2 small onion, finely diced
1 clove garlic, minced
1/4 tsp salt
fresh ground pepper
1/4 cup flour
1/2 tsp dried oregano
1/4 tsp dried basil
1/4 cup parmesan cheese
1/4 cup sour cream
1 lb ground beef
8 oz uncooked linguine
Heat a large skillet over medium high heat. Add the ground beef all at once but do not stir at first, this allows the beef to form a crispy golden brown exterior. Season the top side with seasoned salt, to your own tastes. When the bottom side of the meat has turned golden brown, flip it over and season the new side with season salt. Cook the meat until done, and set aside.
Heat milk and broth together in a microwave, or on the stove. Set aside. In a medium pot cook the linguine until done, according to package instructions.
While the pasta is cooking: In a large skillet over medium-high heat add the butter, then turn down to medium heat and let the butter melt. Add the onion, garlic, salt, and pepper, and saute until the onions are soft. Whisk the flour into the butter mixture, until it turns golden. Pour in the hot liquid and whisk vigorously until there are no lumps. Stir occasionally until the sauce thickens. Add the parmesan cheese and sour cream, and stir until the cheese melts. Add the cooked beef and stir to mix. Remove from heat.
Place the cooked linguine on a serving platter, then pour the beef sauce over the pasta. Serve immediately. Enjoy!
Tip: Heating the milk before adding it to the flour helps to prevent lumps in your sauce.
.jpg)
Angel Food Cake with Pink Grapefruit Cream Cheese Icing
.jpg)
I passed a display of pink grapefruit at the grocery store the other day, and even though it wasn't on my list - I have to follow my list or else I buy everything in the store - I picked a few up and put them inconspicuously in the grocery cart. I tried to convince myself that my inner grocery Nazi wouldn't have noticed. I love pink grapefruit - The summery mix of pink and yellow, and the citrusy aroma that makes the back of your tongue start to water. Sprinkled with a little sugar this is one of my favorite citrus flavors.
While trying to decide what I wanted to do with them, I thought the flavor would go well with an angel food cake. So I made angel food cake, cut them into squares and spooned a Pink Grapefruit Cream Cheese Icing over them. Then I garnished them with sugared gumdrop petals. I could have added the pink grapefruit juice to the cake batter, but I knew my husband wouldn't eat it that way, so I kept my grapefruit obsession to the icing. He could eat his cake plain. I didn't stop with adding pink grapefruit juice to the icing, I stirred in the zest and a few spoonfuls of the grapefruit pulp also. It was perfection!
Angel Food Cake
2 1/2 cups sugar
1 1/2 cups all-purpose flour
1/2 tsp salt
2 1/2 cups egg whites (about 18 large eggs)
1 tsp cream of tartar
1 tsp vanilla extract
Pink Grapefruit Cream Cheese Icing
6 oz cream cheese, softened
1/8 cup butter, softenedjuice of one whole pink grapefruit
10 oz powdered sugar
zest of one whole pink grapefruit2 Tbsp pink grapefruit pulp/flesh
For the Cake:
Preheat the oven toe 375F. Line the bottom of a 9x13 pan with aluminum foil, leaving 3 inches to extend over the sides of the pan. Do not grease the pan or foil, this will prevent the cake from being able to climb the pan and rise.
In a medium bowl: Sift the flour, sugar and salt together. In an electric stand mixer, beat the egg whites and cream of tartar at high speed until stiff peaks form. Gently fold the sugar mixture into the egg whites, 1/3 cup at a time, folding just until blended. Fold in the vanilla, and spoon the batter into the pan. The pan will be very full, this is OK.
Place the pan on an oven rack placed in the bottom third of the oven, and bake for 30-40 minutes, or until a wooden pick inserted into the center of the cake comes out clean. Turn the cake upside down onto a lightly greased wire rack, allow to cool for 1 hour or until completely cool, with the pan over the cake. Once cake has cooled, remove the pan and peel the foil off the cake.
For the Icing:
Beat the cream cheese and butter at medium speed until creamy. Add the grapefruit juice, beating just until blended. Gradually add the powdered sugar, beating at low speed until mixed. Gently stir in the pink grapefruit zest and the pulp. If not using the icing now, you can cover and keep in the refrigerator. I like to serve the icing cold, it tastes more refreshing this way.
Cut the cake into squares and spoon the icing over the top of the cake, allowing icing to drizzle down the sides. Serve as is, or garnish with Gumdrop Rose Petals. Enjoy!
.jpg)
.jpg)
Gumdrop Rose Petals:
Gumdrops in desired colors
small bowl of sugardampened paper towel
Take a gum drop, kneading and pressing it with your fingers until it looks like a flower petal. Dredge lightly in sugar and let dry on a wire rack for at least a couple of hours, but best results are after 24 hours. When working with the gumdrop, use a dampened paper towel to moisten your fingers, this will help prevent the candy from sticking to your fingers. You can combine different colors of gumdrops, to make new colors; like red and white for pink petals. Another technique is to press a small amount of one color, to the side of a larger ball of a different color. This creates the look of a petal with different color strokes.
.jpg)
.jpg)
(Recipe inspired by Lemon Angel Food Cake, Classic Southern Desserts )
)
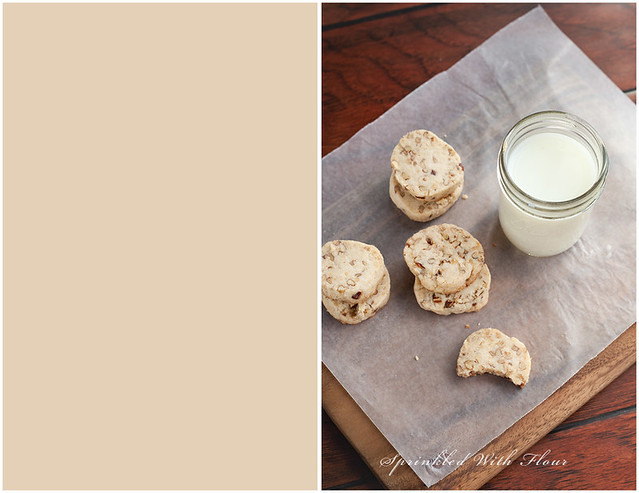
Browned Butter Pecan Shortbread

This is the second recipe I made from the brown butter obsession I had yesterday. I happened to pass a miniature bag of Walkers shortbread cookies in a checkout aisle the other day, and was cajoled into buying them by my son. Don't you love the strategic placing of kid sized treats in checkout aisles? I sometimes think this is a conspiracy plot against all mothers. After sampling a couple, I remembered how much I love shortbread, and was inspired to make some of our own at home. The addition of brown butter and pecans make these little cookies very addicting.
Browned Butter Pecan Shortbread
1 1/2 cups butter, cut into pieces
3/4 cup brown sugar, firmly packed
3/4 cup powdered sugar
1 tsp vanilla extract
3 cups all-purpose flour
1 1/2 cups finely chopped pecans, toasted
In a large skillet, cook the butter over medium heat, stirring constantly. After about 6 to 8 minutes, the butter will turn golden brown, and form tiny brown specks at the bottom of the pan. Promptly remove pan from heat, and pour butter into a shallow dish. Do not cover. Chill for 1 hour in the refrigerator, until the butter is cool and begins to solidify.
In an electric mixer, beat the butter at medium speed until creamy. Gradually add the sugars, mixing until smooth. Add the vanilla extract. Gradually incorporate the flour, beating at a low speed just until blended. Stir in the pecans. Shape the dough into 4 (8 inch) logs, or divide dough into 4 sections and press out flat to a 1/4 inch thick disc. Wrap tightly with plastic wrap and chill 2-4 hours or until firm Wrap tightly with plastic wrap and chill 4 hours or until firm.
Preheat your oven to 350F. Cut the logs into 1/4 inch thick slices, or if you did the disc just use a small round cookie cutter to cut out your cookies and place on a greased cookie sheet. Bake for 8 to 10 minutes, or until lightly browned. Remove from oven and allow the cookies to cool on a wire rack. Enjoy!
Recipe note: Your dough will be fairly dry and a bit crumbly, just continue to work with it, pressing it together and the cookies will turn out fine. I prefer to use the flat disc method, then I can cut out my cookies with a cutter, and re-roll the scraps to cut out more cookies.
Amber

Just Peachy Glazed Porkchops
Peach Glazed Pork Chops
5 fresh peaches, sliced with skins removed
1/3 cup soy sauce
1/4 cup honey
1 Tbsp brown sugar
1 clove garlic
1 tsp toasted sesame seeds
4 bone-in pork chops
Place sliced peaches, soy sauce, honey, brown sugar, garlic and sesame seeds in a blender or food processor. Blend until smooth. Season both sides of pork chops with salt and fresh ground pepper. Grill pork chops over indirect heat for 10 minutes each side. Then baste both sides with the peach glaze and cook each side for another 10 minutes, or until juices run clear and pork chops are done. Serve immediately and don't forget the napkins! :)
.jpg)
Malted Milk Ball Chewies
.jpg)
I bought a large container of Whopper's at the store the other day, with the intention of making cookies with them. I naively left the box on the counter - thinking them safe - and returned to find the box nearly empty. There was just one, lonely little malt ball looking up at me, wondering where the rest of his malted friends had disappeared to. Naturally, I put the little guy out of his misery and popped him in my mouth, letting him join the fate of his friends. Now I had to return to the store and buy another box.
I should have learned my lesson and made the cookies as soon as I got back home, but again I procrastinated, this time stashing the box on top of the refrigerator - thinking myself sneaky. I should have known I live in a house of candy sniffing pro's. This time, I intercepted the culprits when the box was only half empty, and managed to salvage the rest to make my cookies. The result was a thin, chewy cookie with hints of malt balls. It was very good, and the texture would make a great ice cream sandwich. In fact, I may go to the store to buy ice cream just for that reason.
.jpg)
Malted Milk Ball Chewies
3/4 cup butter, softened
3/4 cup brown sugar, firmly packed
3/4 cup granulated sugar
2 large eggs
1 1/2 tsp pure vanilla extract
2 cups all purpose flour
1 cup quick-cooking oats
1 tsp baking soda
3/4 tsp salt
2 cups malted milk balls, coarsely chopped
3/4 cups pecans, finely chopped (optional)
3/4 cups pecans, finely chopped (optional)
Preheat oven to 350F. In a mixing bowl, beat the butter and sugars together at medium speed until creamy. Add the eggs and vanilla, mixing until blended. In a medium bowl combine the flour, oats, baking soda, and salt. Gradually add the flour mixture to the butter mixture, mixing well. Stir in the chopped malted milk balls, and if desired pecans. Drop by tablespoons onto an ungreased baking sheet. Bake 8-12 minutes, depending on how crisp you like your cookies. Let cool for 1 minute, then transfer cookies to a wire rack to cool completely.
.jpg)
Steak & Cheddar Nachos
One of my favorite appetizers at a local restaurant is smoked steak nachos. They layer thick, manly sized slices of smoked steak on mounds of crispy tortilla chips and gooey cheese. Topped with lettuce, tomato, sour cream, guacamole, and jalapenos, they are a definite appetite crusher. Since I acquired some leftover steaks from my husbands birthday dinner at the in-laws, I decided to slice them up and make my own steak nachos for dinner. I was feeling a little adventuresome and made a cheese sauce to pour over them, instead of plain shredded cheese, which turned out very tasty. Since the cheese sauce is more liquid in consistency, you have to be careful not to pour too much and make the chips soggy - which I did - but they were good nonetheless.


Steak & Cheddar Nachos
6-oz milk
2 eggs, beaten
1 tsp salt
1/4 tsp pepper
10 oz shredded cheddar cheese
1/8 tsp cumin
1 can kidney beans, drained
2 steak fillets, cooked and sliced
6 cherry tomatoes, sliced
lettuce, shredded
tortilla chips
Heat oven to 350F. Place tortilla chips on a baking sheet, and put in the oven to warm up.
In the meantime: In a measuring cup, add the milk, beaten eggs, salt, and pepper. Over medium heat, pour the mixture into a medium sized saucepan and add the shredded cheese. Cook and stir until the cheese is melted. Add the cumin and kidney beans, stir to combine. Cook until the cheese sauce is hot all the way through. Remove the chips from the oven, and pour some of the cheese sauce over the tortilla chips. Don't pour too much, or the chips will get soggy. Layer the sliced steak over the cheese sauce. Sprinkle shredded lettuce and tomatoes over the steak. Drizzle some sour cream over the top of everything. Serve immediately and enjoy!


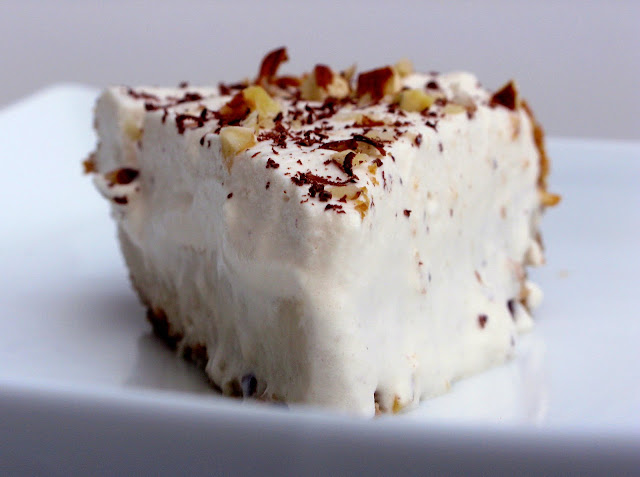
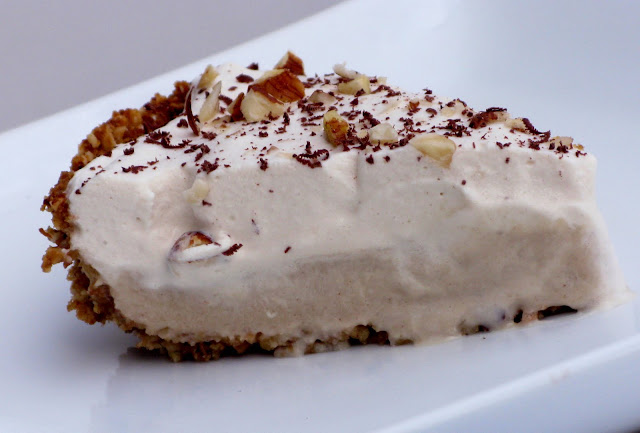
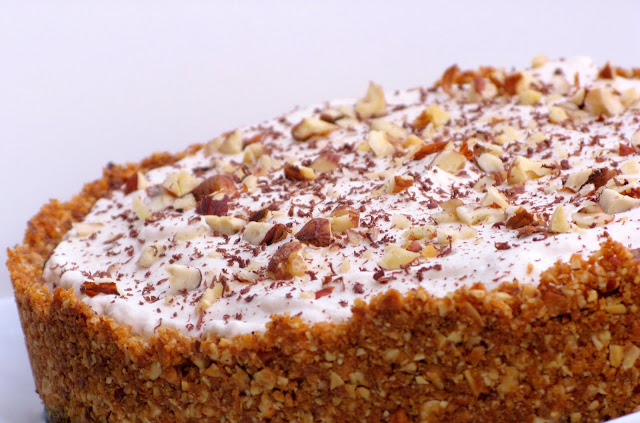
Cinnamon Chai Cream Pie with Hazelnut Crust
The creation of this pie is due to my sister-in-law introducing me to Tazo Chai concentrate. Mix a little concentrate with some milk and you have your own Chai drink. Put it in the freezer for a little bit, and you have a frozen Chai drink. The possibilities are endless. I decided that the Chai would work great in a cream pie, and immediately thought to make a pie with my cinnamon vanilla pudding, and Chai whipped cream. To put it over the edge, I put it all in a hazelnut-almond crust.
Most cooks have their share of recipes not turning out like planned, and accidents turning into pleasant surprises. This pie turned out to be my disaster-turned-delicious. What was the problem? My pudding would not set up. I have made it numerous times before, and never had any trouble, but of course the one day it would go wrong would be when trying a new recipe. After being in the fridge for a couple of hours and still looking pathetically like a cinnamon soup, I decided to throw it in the freezer to see what happened. As it turns out, frozen pudding is quite good. So I went with it - topped it with the Chai whipped cream - and sprinkled with chopped hazelnuts and shaved chocolate. It was good!

In a heavy bottom medium saucepan, mix the cornstarch and brown sugar. Gradually add the milk and cook over medium heat until bubbly, stirring constantly. Cook and stir for 2 more minutes and remove from heat. Add the cinnamon and stir. Gradually add one cup of the milk mixture to the beaten eggs. Pour the egg mixture into the milk mixture in the saucepan. Cook the pudding until almost bubbly, but don't allow to boil. Reduce heat and cook for 2 more minutes, then remove from heat. Add the butter and vanilla, and stir. Pour the pudding into the pie crust, and place in the freezer for a couple of hours, until frozen through.

Most cooks have their share of recipes not turning out like planned, and accidents turning into pleasant surprises. This pie turned out to be my disaster-turned-delicious. What was the problem? My pudding would not set up. I have made it numerous times before, and never had any trouble, but of course the one day it would go wrong would be when trying a new recipe. After being in the fridge for a couple of hours and still looking pathetically like a cinnamon soup, I decided to throw it in the freezer to see what happened. As it turns out, frozen pudding is quite good. So I went with it - topped it with the Chai whipped cream - and sprinkled with chopped hazelnuts and shaved chocolate. It was good!

Cinnamon Chai Cream Pie
Cinnamon Pudding:
3 Tbsp cornstarch
3/4 cup brown sugar (or turbinado sugar)
3 cups milk
2 eggs, beaten
1/2 tsp cinnamon
1 Tbsp butter
1 1/2 tsp pure vanilla extract
Chai Whipped Cream:
1 Cup heavy whipping cream, chilled
3/4 cup Chai liquid concentrate (sweetened), chilled
Hazelnut Crust:
1/2 cup hazelnuts, toasted and finely chopped
1/2 cup almonds, toasted and finely chopped
3/4 cup graham crackers, crushed
3 Tbsp brown sugar
4 Tbsp butter, melted
Heat oven to 350F. Place nuts on a baking sheet and toast for about 10 minutes. Remove from oven and allow to cool. Once you are able to handle them, remove the skins from the hazelnuts. Finely chop the hazelnuts and almonds. Place the graham crackers in a resealable bag, and crush into fine crumbs. In a medium bowl, mix the graham cracker crumbs, chopped nuts, brown sugar, and melted butter until well combined. Press the mixture firmly into the bottom and sides of a spring-form pan. Bake at 350F for 12 minutes, or until golden. Remove from oven and let cool.

In a heavy bottom medium saucepan, mix the cornstarch and brown sugar. Gradually add the milk and cook over medium heat until bubbly, stirring constantly. Cook and stir for 2 more minutes and remove from heat. Add the cinnamon and stir. Gradually add one cup of the milk mixture to the beaten eggs. Pour the egg mixture into the milk mixture in the saucepan. Cook the pudding until almost bubbly, but don't allow to boil. Reduce heat and cook for 2 more minutes, then remove from heat. Add the butter and vanilla, and stir. Pour the pudding into the pie crust, and place in the freezer for a couple of hours, until frozen through.

Place the cream, chai concentrate, mixer bowl, and whisk in the freezer. Allow to chill for about 10 minutes. Pour the heavy cream into the cold mixer bowl, add the Chai concentrate, and mix on high speed until cream is whipped into soft peaks. Spread the whipped cream over the layer of pudding. Sprinkle with toasted hazelnuts and shaved chocolate. Serve and enjoy!


Fried Egg Sandwich with Cream Cheese-Cheddar Spread
Today I made homemade bread. It has been quite a while since I've attempted to make a loaf, since all my past efforts at making a whole wheat bread were not exactly successful. So I compromised on the whole wheat aspect today and made a white loaf, but it was a success! I made a boule recipe from Artisan Bread in 5 Minutes a Day , and have to say that it was almost perfect. The crust was just the right balance of crispy and chewy, and the inside was light, fluffy and flavorful. I wanted to use it to make sandwiches for dinner tonight, and almost ate half the loaf before the sandwiches were even made. I probably met my weekly carb count in just that one sitting, if I was someone who counted them. I enjoy those pesky little carbs too much to live without my beloved bread and sugar.
I used the bread to make fried egg sandwiches with an herbed cream cheese-cheddar spread. Sort of my take on a bacon, egg, and cheese sandwich...but minus the bacon. If I'd had any in the house, there definitely would have been bacon on this sandwich, but I was too lazy to make a trip to the store just for bacon. Now I know everyone likes their eggs cooked differently, and I am in the group that likes 'em over easy. Give me a runny yolk, firm whites, and a dash of salt and pepper over the scrambled type any day. I present: Fresh baked bread slathered in an herb cream cheese-cheddar spread, topped with lettuce, cherry tomatoes, and a tender fried egg.

Fried Egg Sandwich with Cream Cheese-Cheddar Spread
(Serves 2)
3 ounces cream cheese1 Tbsp mayonnaise
1/8 tsp salt
1/8 tsp onion powder
1/4 tsp fresh rosemary, finely chopped
freshly ground black pepper
1/3 cup sharp cheddar cheese, shredded
2 Eggs
4 slices of good quality bread
lettuce
6 cherry tomatoes, sliced
Place the cream cheese in a small microwavable bowl, and heat in the microwave until soft. Add the mayonnaise, salt, onion powder, rosemary, and fresh ground pepper to taste. Stir until well combined. Add the shredded cheese. Microwave in 10 second intervals, until the cheese is melted and the mixture is smooth and creamy.

Spread some of the cheese mixture over two slices of bread.

On one side, layer lettuce, tomato, and if desired bacon. Set aside. In a small skillet, heat a tablespoon of butter over medium heat. When the pan is hot, add an egg and cook for 3-4 minutes, then gently flip. Cook the other side for about 30 seconds, then remove pan from heat. Slide the egg out of the pan and onto the sandwich. Season with fresh ground pepper and salt. Top with the other slice of bread. Serve immediately and enjoy!

And if you like your eggs over easy, it will look like this. Yum.


Turtle Cookie Bars

I have been wanting to dive into the world of digital SLR cameras, and have been researching different models to the point I have a headache. My mother-in-law graciously let me borrow her camera, which is a Canon G9, to see if I liked it. While it is not a DSLR camera, it has the capability to manually set the controls, and you can use different lenses with it. I played around with it today, and like the improvements I can see in my photos, even though I don't really know what I'm doing.
I used it today when I made these Turtle Cookie Bars. I love turtle candies, and I love cookies, so I put the two together and made these. They have a shortbread type cookie bottom, with a layer of salty pecans and caramel, topped with melted milk chocolate and a sprinkling of chopped pecans. They are decadent and very rich, perfect for small bite sized treats. It has been near 100 degrees here today, so I kept mine in the fridge and served them cold, but they can be left at room temperature. Serve with an ice cold glass of milk, and you have the perfect guilty afternoon snack.
Turtle Cookie Bars
2 cups all-purpose flour
1 cup firmly packed brown sugar
1/2 cup unsalted butter (room temperature)
1 cup pecan halves
2 tsp salt
2/3 cup unsalted butter
1/2 cup firmly packed brown sugar
1 1/2 cups milk chocolate chips
1/4 cup pecans, finely chopped
In the bowl of an electric mixer, combine the flour, sugar, and butter. Mix on medium speed until well combined. Firmly press the mixture into the bottom of an ungreased 9 x 13 pan. In a small bowl, mix the pecan halves and salt together. Layer the pecan halves over the crust.

In a medium pan, cook the butter and brown sugar over medium high heat, until boiling. Cook for 3 minutes, then remove from heat. Pour the mixture evenly over the pecans.

Place the pan in a 350F oven, and cook for 15 minutes, or until golden and bubbly. Remove from the oven and sprinkle the chocolate chips over the pecans. Allow the chips to soften for a few minutes, then gently swirl the chocolate over the pecans. Sprinkle with finely chopped pecans, and let cool for two hours. Cut into bars, serve, and enjoy!

(adapted from Southern Living Classic Southern Desserts)
Cheesy Cornflake Potatoes
We grilled some steaks for dinner tonight, and I made a comfort food side dish that is one of my husbands favorite things. Cheesy Cornflake Potatoes. They are very simple to make, but don't underestimate the melty, cheesy, goodness. The recipe is from my mother-in-law, and uses two cans of condensed soup, but you can use homemade condensed soup, or a white sauce if you don't want to use the store bought kind. Sprinkled with a buttery, cornflake topping, these potatoes shamelessly tempt you to have a second helping.


Cheesy Cornflake Potatoes
1 can cream of chicken soup
1 can cream of mushroom soup
8 oz sour cream
2 cups shredded cheddar cheese
12 oz frozen hashbrown potatoes, thawed
2 cups cornflakes, crushed
1 tbsp butter, melted
In a large bowl mix the soups, sour cream, and shredded cheese. Stir until well combined. Add the thawed hashbrown potatoes, and stir until thoroughly mixed. Pour the potatoes mixture into a 9 x 13 dish, or one of similar size. Put the cornflakes in a medium sized bowl, and coarsely crush. Melt the butter, and pour over the cornflakes. Stir to mix. Sprinkle the cornflake mixture over the potato mixture, making sure the potatoes are evenly covered. Bake at 350F for one hour.

Eat me.

Fried Asian Cucumber Crinkles
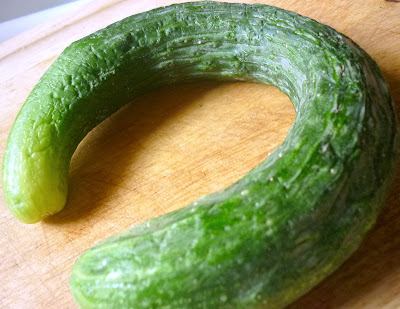
I went to eat lunch the other day at this little cafe that's located on an orchard. Sunshine Valley Farm Cafe, in Rogersville, Missouri, is nestled on the edge of a little orchard, surrounded by rows of apple, peach, and plum trees. There is outdoor seating by way of a wrap around porch, with quiet views overlooking the orchard, or you can escape the summer heat and sit inside. The menu is simple, offering an assortment of quiches, sandwiches, soups, muffins, pies, turnovers, and cookies. They use their own homegrown fruits and vegetables in the cafe, in season. At the entrance to the cafe, there is a little gift shop where you can buy baskets of fresh picked peaches, blackberries, vegetables, honeys, and jams. This is where I picked up something that I had never seen before. An Asian cucumber.

Fried Asian Cucumber Crinkles
1 Asian cucumber, cut into slices
1/2 cup all-purpose flour
2 tsp salt
2 tsp paprika
1 tsp garlic powder
1 tsp sugar
freshly ground black pepper
2 tablespoons soy sauce
2 tablespoons olive oil, for frying
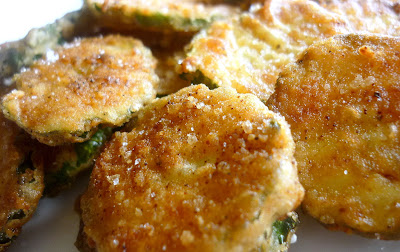
Cut the cucumber into slices. Place the cucumber chips into a small bowl, and pour the soy sauce over them, tossing to coat. Set aside. In a shallow dish; mix the flour, salt, paprika, garlic powder, sugar, and pepper. Dip the cucumber slices into the flour and toss, making sure the slices are evenly coated. Heat the oil in a small skillet, over medium heat. When the oil is hot, gently place some of the cucumber slices into the oil. Don't crowd the pan with too many. Fry for about one minute, then use some tongs to flip the slices over. Cook the second side for about another minute. Keep an eye on them making sure not to let them burn. They will cook very quickly. Put the fried cucumber slices on a plate lined with paper towels, and let drain. Fry the remaining cucumber slices, then let drain. Sprinkle with a little bit of seasoned salt and sugar. Serve immediately. Enjoy!

At first glance I thought it was some sort of squash, but the owner told me was an Asian cucumber, which she explained was a little sweeter than a regular cucumber. For fifty cents, I bought one, not knowing what I was going to do with it. I also picked up a jar of Blueberry Blossom Honey. Yum.
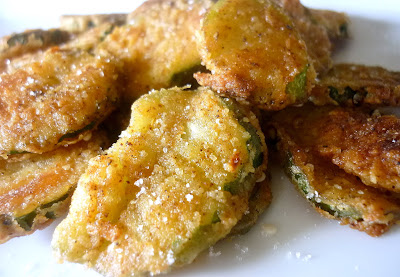
Since I recently purchased a mandolin, which had several attachments, including one to waffle cut and crinkle cut, I thought I'd put it to use on my funny looking cucumber. I sliced it up into crinkle cut chips.
Don't they look pretty?

Then I wanted to make a snack out of them, so I turned them into Fried Asian Cucumber Crinkles.

Fried Asian Cucumber Crinkles
1 Asian cucumber, cut into slices
1/2 cup all-purpose flour
2 tsp salt
2 tsp paprika
1 tsp garlic powder
1 tsp sugar
freshly ground black pepper
2 tablespoons soy sauce
2 tablespoons olive oil, for frying
Cut the cucumber into slices. Place the cucumber chips into a small bowl, and pour the soy sauce over them, tossing to coat. Set aside. In a shallow dish; mix the flour, salt, paprika, garlic powder, sugar, and pepper. Dip the cucumber slices into the flour and toss, making sure the slices are evenly coated. Heat the oil in a small skillet, over medium heat. When the oil is hot, gently place some of the cucumber slices into the oil. Don't crowd the pan with too many. Fry for about one minute, then use some tongs to flip the slices over. Cook the second side for about another minute. Keep an eye on them making sure not to let them burn. They will cook very quickly. Put the fried cucumber slices on a plate lined with paper towels, and let drain. Fry the remaining cucumber slices, then let drain. Sprinkle with a little bit of seasoned salt and sugar. Serve immediately. Enjoy!

Subscribe to:
Posts (Atom)


