
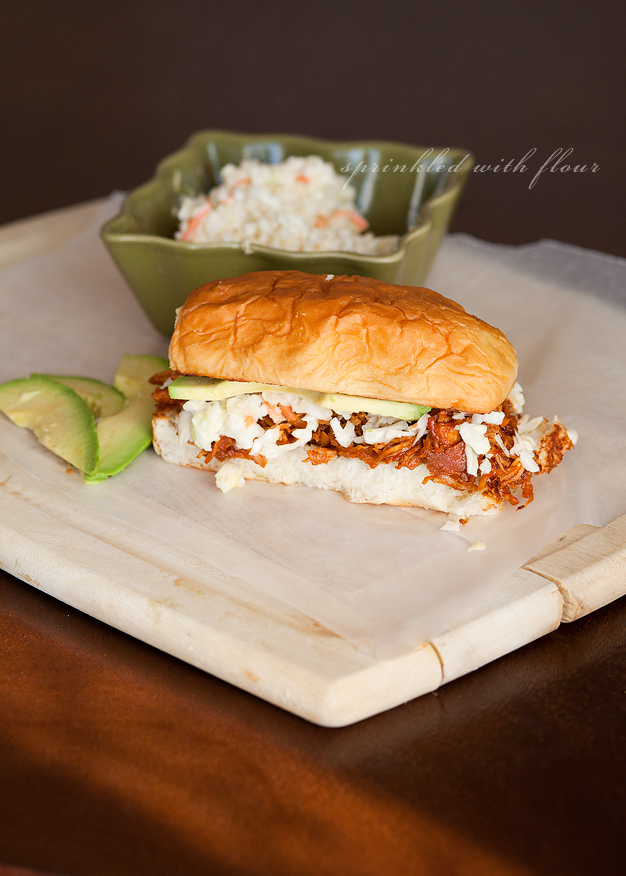
Slow Cooker Peach BBQ Chicken Sandwiches

Do you like barbeque? How about pulled chicken sandwiches? How about easy slow cooker recipes?
Oh you do?
Well then, pull up a chair, get comfy, and be prepared to drool - because amazing barbeque is about to happen.
Barbeque and pulled chicken are two of my favorite things, and when you put them together you get one awesomely delicious meal. In my humble opinion at least.
I found this recipe for Slow Cooker Peach BBQ Chicken Sandwiches on Tasty Kitchen and knew it was going on my menu plan - STAT. The chicken is slow simmered in a spicy sweet barbecue sauce that has a great kick from peach preserves. I loved the peach flavor and ate copious amounts of the chicken by itself while I was shredding it. I also used my Amazing Barbeque Sauce - I like to call it Awesome Sauce, but you can use any kind that floats your boat.
So we've established the chicken is good. Now add a heaping of your favorite coleslaw, and a few healthy slices of fresh avocado, and you have yourself one really delicious sandwich.

For the recipe head on over the the Tasty Kitchen blog where you can check out my full step-by-step post and grab the printable recipe too!

Strawberry Avocado Gorgonzola Salad

I have to confess, I've been gorging myself on some pretty indulgent food lately. Sometimes you just need a plate (or two) of some good homemade comfort food.
But when your pants start getting a teeeny bit snug, it's a sign that maybe you need a break from those delicious calories. For me, a good crunchy salad is the first thing I turn to when I need to jump off the jiggly thigh train. The only problem is my salads tend to get boring. I don't keep exciting salad fixings in my fridge on a regular basis, but this time I was lucky to have picked up a few extra goodies at the store. I eyed some strawberries, a package of gorgonzola cheese left over from my Creamy Gorgonzola Dressing, some bacon, and a bundle of fresh avocados.
It all sounded good to me - so in it all went! I added some grilled chicken and a bit of chopped pecans for texture - gotta have texture. This salad was really good and hit the spot. If you wanted to trim off some extra calories you could forego the bacon, but I love my bacon. Next time you want to liven up your salad, try this one out. Enjoy!
Amber


Strawberry Avocado
& Gorgonzola Salad
Yield: 1 salad Printable Recipe
2 cups leafy greens
1/2 cup grilled chicken, sliced
1/2 avocado, sliced
2 slices bacon, cooked crisp and crumbled
1/2 cup fresh strawberries, hulled and sliced
1/4 cup crumbled gorgonzola cheese
1/8 cup chopped pecans
Creamy Gorgonzola Dressing to garnish, as desired
Directions:
Wash greens and drain. Slice your grilled chicken, avocado and strawberries. Cook bacon until crisp, drain grease and crumble or chop bacon into pieces. Fill your bowl or plate with your greens, top with sliced chicken, avocado, crumbled bacon and sliced strawberries. Sprinkle the crumbled gorgonzola cheese and pecans on top. Drizzle on some homemade Creamy Gorgonzola Dressing if desired, but this salad is just as good on its own. Grab a fork and dig in!
You can grab the recipe for the dressing in my Creamy Gorgonzola Dressing post.
Blueberry Kuchen


It's raining here today, AND snowing, at the same time. I love rain - call me crazy, and I love the snow, but the two together make for a very gross combination. Dirty slush is no fun to get out in, so that's why I'm staying in today - with a slice of this breakfast treat.
Blueberries. Check. Amazingly good crumbly topping. Check. No kid or husband around to see me finish off the entire pan. Check.
A good coffee cake and cup of hot tea or coffee is the perfect answer to dark, dreary days like today. This Blueberry Kuchen is another delicious recipe from Tasty Kitchen, submitted by TK member Deborah. I had to stop myself from eating the crumb topping by itself when creating the step-by-step post. The topping is kinda crucial to this cake. Are you hungry yet?
Head on over to the Tasty Kitchen blog to read my full post and grab the printable recipe while you're at it. Enjoy!
Amber


Let's connect! Follow me on Pinterest
Chunky Twix Cookies: Before & After

I think it's time for another before and after post, don't you? If you missed my last one and are wondering what the heck I'm talking about, you can read about it in my Browned Butter Pecan Shortbread: Before & After post.
In a nutshell, I'm slowly updating my older posts with newer, improved photos - and adding a critique of my older photos rather than just deleting them willy nilly.
While I'd love to banish them to the dark recesses of my computer's recycle bin forever, I thought it more helpful to share them and add the tips I've learned along the way. Today I chose one of my most popular recipes, my Chunky Twix Cookies. I don't use the term "The Best" very often, but these cookies really are the best cookies I've made to date. They've made it around the blogging world quite a bit, and are highly coveted by my family. Since these are my best cookies, I thought they deserved a better photo. Now let's trash my photo! :)
Here is the Before:

When I first started trying to improve my food photography, I decided to jump on the bandwagon with everyone else, and tried to do what everyone else was doing. This led me to Michael's to stock up with all kinds of patterned papers to act as "backdrops" to my recipes. A few bucks poorer, a few years wiser, and I learned that SIMPLE is better.
What makes a striking photo? Usually an image that has a single theme or idea, with clutter kept to a minimum makes for the best photo. Successful photos rely on elements of composition: line, shape, form, texture, pattern, and color. Every photo whether intentional or not, contains one or more of these elements.
In this image, the patterned paper clashes with the patterned plate and the deeply textured cookies. There's also too much color going on. When composing an image, try to keep the colors to 3 or less. More than that and your picture can become distracting. There's just too much going on in this picture and it stresses the eye out trying to decide what to focus on.
2. Awkward Focus Spot:
When choosing where to focus on your food, it's best to focus on the area that is closest to you, this is especially true when you're using a large aperture (small number) because your depth of field (the area that is in focus) will be shallow. In this image you can see I placed my focus point near the center of the image, rather than the area of cookie closest to me. This makes the front of the food out of focus, which doesn't work in this image.
The way the plate is angled, the out of focus part of the cookie is the center of attention, and where your eye naturally wants to fall. For this reason, I should have set my focus point to the closest area of cookie, or stopped down my aperture setting so more of the cookies were in focus.
3. Composition Too Tight:
As in my last post, here is a prime example of when to back up already Amber! :) I'm either too close to my food or have cropped it too close. The plate, glass of milk, and background are so close together there's no room to breathe. When looking at a photo you want to have room for your eye to move around the image. That's not too say don't ever have a close up, but in this photo it doesn't work very well.
Now here's the After:

Settings: f4.0; Shutter 1/160; ISO 1250
A little easier on the eyes don't you think? I kept it simple with a plain white napkin under the serving dish, the milk and and cookie rack are arranged in the background to allow the eye to wander around the image and come back to the main point of focus - those yummy cookies!
I also made sure to place my focus point on the front edge of the closest cookie, to eliminate any out of focus areas on the cookie. You'll notice I set my aperture to f4.0 so my depth of field wasn't too shallow. I was lazy and didn't want to pull out my tripod, so this shot was handheld. But if I wanted to decrease my ISO I could have lowered my shutter speed accordingly. I used my 85mm lens for this shot, and generally you want to keep your shutter speed to about 1 to 1 1/2 times the focal length of your lens (if hand holding), to avoid camera shake. So for an 85mm focal length, you want to keep your shutter speed at least 1/80 or 1/100. For a 50mm focal length - 1/50 or higher, etc.
You can find the recipe in my original post for Chunky Twix Cookies. If you have any questions about this critique or want me to go into more detail, just leave a comment and I'll be happy to answer them! If you found this helpful I'd love to hear from you. Thanks!
Note: I don't claim to be an expert, but I have learned a thing or two over the years and will gladly share those things with people. I'm also a family photographer in the St. Louis area, so if you're interested in seeing my work outside of food photography, visit Amber Potter Photography.
Update: If you're just starting out in the photography world and need some help understanding all that photo jibber-jabber, my pal Karly at Buns In My Oven has started a great series called So You Want To Be A Better Photographer? Her tutorials are sure to help you "see the light". Hehe...bad pun? Anyway, her tips combined with my before and after critiques are a good way to see the photography principals put into practice, and learn to recognize what's wrong with an image. When you can tell what's wrong with a photo and why it doesn't work, then you can better improve your own skill!
Amber

This month I also joined a new project - The Leftover's Club. This is a group of blogger's who get paired up with another blogger each month, to share the leftovers from the goodies we made. It's a great way to get to know each other, and have someone else take some of the temptation off our hands. This month I'm paired up with Budget Gourmet Mom, and can't wait to share our goodies! Sound like fun? Visit The Leftovers Club online to learn more and sign up!
Savory Simple - Cappuccino Cookies
Damn Delicious - Blueberry Lemon Bars
Give Peas a Chance - Spiced Vanilla Honey Biscotti
Kelly Bakes - Dulce de Leche Digestive Cookies
Sprinkled With Flour - Chunky Twix Cookies
Pineapple and Coconut - Cinnamon Dolce Oatmeal Cookies
Budget Gourmet Mom - Salted Caramel Peanut Butter Stuffed Cookies
Creamy Gorgonzola Dressing

 I don't know about you but I love cheese with flavor. Growing up in the U.K. we had really good cheese and really good bread, which are just two of the things I miss most. I especially love blue cheese, and anything of the moldy variety for that matter.
 I do love me some mold - er, on my cheese that is. As long as it's not in my husbands dirty socks - or found behind my child's bed, I'm good.
Roquefort, Stilton, Gorgonzola, the list goes on - I could be happy with any of these. I ran across this container of Gorgonzola cheese at the store the other day, and I knew I had to grab it. I didn't know what I was going to do with it, but I finally decided on whipping it up into a creamy salad dressing.
Fresh, crunchy greens can only get better under a creamy layer of Gorgonzola deliciousness, right? I experimented on amounts, adding a little of this and a little of that, and finally ended up with this dressing. It's pretty tasty if I do say so myself.
Creamy Gorgonzola Dressing
Yield: 1 cup Printable Recipe
1/4 cup mashed Gorgonzola cheese
1/4 cup mayonnaise
1/4 cup sour cream
1/4 cup buttermilk
1 clove garlic, finely minced
1 tsp fresh lemon juice
salt, to taste
fresh cracked black pepper, to taste
In a small bowl mash the gorgonzola cheese with the back of a spoon. Add the mayonnaise, sour cream, buttermilk, minced garlic, and lemon juice. Whisk until well combined. Add salt and fresh ground black pepper to taste. Now pop it in the fridge overnight for the flavors to marry together. Serve over your favorite salad or have a veggie dipping palooza. Enjoy!
Amber


Dr.Seuss Strawberry Marshmallow Skewers


I've got a super easy, super quick treat to share with you today. This week has been celebrate Dr. Seuss week at my son's school, and each day they've done something different to celebrate it and a love for reading. Today he got to dress up with the Dr. Seuss theme.
I packed him a Dr. Seussified snack that will be sure to make his classmates green...and not the green eggs kind. (Yeah, kinda dumb pun - I know.)
I call these Dr. Seuss Skewers because of the red and white layered effect. Just alternately slide a strawberry and a marshmallow on a skewer - I used a straw for safety reasons - wouldn't want an angry mom calling me because her kid poked his eye out.
You never know with Kindergartener's. Accidents are just waiting to happen around EVERY corner.
These are a really fun way to dress up some fruit. Served with a side of yogurt dipping sauce they're a great strawberry snack. Try them out with your kids, they'll love them!


Dr. Seuess Strawberry & Marshmallow Skewers
Yield: 1 skewer Printable Recipe
4-5whole strawberries, washed and stem removed
4-5 large marshmallows
1 straw or skewer
Slide one strawberry onto the skewer, then a marshmallow, repeat until you've filled your skewer or straw. Serve with side of creamy yogurt for a yummy dipping sauce. Easy peasy. Enjoy!
Amber


Subscribe to:
Posts (Atom)


