Raspberry Almond Bars

My husband and I joined a gym this week. Of course, I tell myself that this year will be different. This year, I will stick to my resolutions and will exist solely on lettuce, carrots, and water. I will get up at 5:00am every morning and happily prance to the gym, chipper and eager to torture my body with endless running and muscle persecuting exercises. I like to afflict agony on my body...at least this is what I have to convince myself in the next few weeks.
My intentions were solidified this morning, by the innocent ponderings of my 4 year old son. Preschoolers have a way of baldly stating their observations, which somehow always come out like an insult. Our conversation (which took place in the bathroom - another favorite pastime of preschoolers - watching you go pee) went something like this:
"Mommy, how come you don't fall in the toilet when you pee?"
"Well, that's because the seat keeps me from falling in."
"Oh, I know....it's because you're butt is big."
"Yes, my butt is bigGER than the seat, which keeps me from falling in."
I tell myself that my eagerness to point out the difference between the adjectives of "big" and "bigger", was the chance to teach him something new. Of course, it had nothing to do with my own pride:) Oh, and our other lesson for today - Helpful Uses Of A Butt: A keep-you-from-falling-in-the-toilet device.
So in light of my need to keep the size of my rear in check, I made these bars to indulge in while I could. They are sweet, buttery and very tasty. You can also customize them by using any preserves you like. Don't worry though, I'll still be making yummy treats, I just won't be wallowing in them every chance I can:)

Raspberry Almond Bars
3/4 cup butter, softened
3/4 cup powdered sugar, plus more for garnish
1 1/2 cups all-purpose flour
3/4 cup seedless raspberry jam
3 egg whites
6 tbsp sugar
1/2 cup flaked coconut (optional)
1 cup sliced almonds
Preheat oven to 350F. In an electric mixer, cream the butter and powdered sugar until light and fluffy. Gradually add the flour and mix well.


Press the mixture into the bottom of a greased 9 x 13 baking pan.


Bake for 18-22 minutes or until golden. Remove from oven.


Spread the raspberry preserves over the crust.


In a large bowl, beat the egg whites until soft peaks form. Gradually add the sugar, 1 tbsp at a time, on high until stiff peaks form. Gently fold in the coconut (if using) and 1/2 cup almonds. Spread the meringue evenly over the jam. Sprinkle the remaining almonds over the top. Return to oven and bake for another 18-22 minutes or until golden.


(adapted from Taste of Home, December 2010)
Smores Cookies

We've had a bit of snow lately, not a lot, but enough to make going anywhere not much fun. Consequently we tend to stay inside, puttering around the house, guiltily enjoying being lazy and unproductive. As most people do, I rashly resolved with the new year to eat more healthily. (healthy = eat only 5 cookies instead of 10).
However, being confined inside a house on a cold snowy day, with my cabinets piled with sugar, chocolate chips, and marshmallows, and my refrigerator well stocked with butter - my resolutions went out the window. Since I'd been wanting to make some form of s'mores cookies for a while, and that bag of mini marshmallows looked awfully lonely on that shelf, I used this as an excuse and whipped up these little bites of heaven.
I have to say, these cookies are up there with my Chunky Twix Cookies, and I foresee a happy future with lots of S'mores Cookies, studded with little pillows of happiness (read: marshmallows) and full of sinful, melty goodness (read: chocolate).
This recipe has made it's away around food blogs, but it is originally from Anna of Cookie Madness. And while my taste buds may praise her genius in creating these bad boys, my waist line a month from now may not:) Eat one warm and fresh from the oven, you won't be sorry.

S'mores Cookies
(adapted from Cookies Madness)
1-3/4 cups all purpose flour
1 cup graham cracker crumbs
1 tsp baking soda
1 tsp salt
1 cup (2 sticks) butter, softened
3/4 cup sugar
3/4 cup brown sugar
2 tsp vanilla extract
2 eggs
2 cups mini chocolate chips
1-1/2 cups mini marshmallows, or large ones cut up
2 Hershey bars, chopped
Preheat oven to 375F. In the bowl of an electric mixer, beat the butter and sugars until light and fluffy. Add the eggs and vanilla to the butter mixture, and mix until combined. In a large bowl, whisk together flour, graham crackers, salt, and baking soda. Add the flour mixture to the butter mixture and mix well. Stir in the chocolate chips.
Use 2 tablespoons or a medium-sized ice cream scoop to drop rounded tablespoons of dough onto cookie sheets. Bake for 7 minutes and remove from oven. Push a few marshmallows and pieces of chocolate into each cookie and return to the oven to bake an additional 3-4 minutes. Allow to cool on a wire rack before inhaling the entire batch!

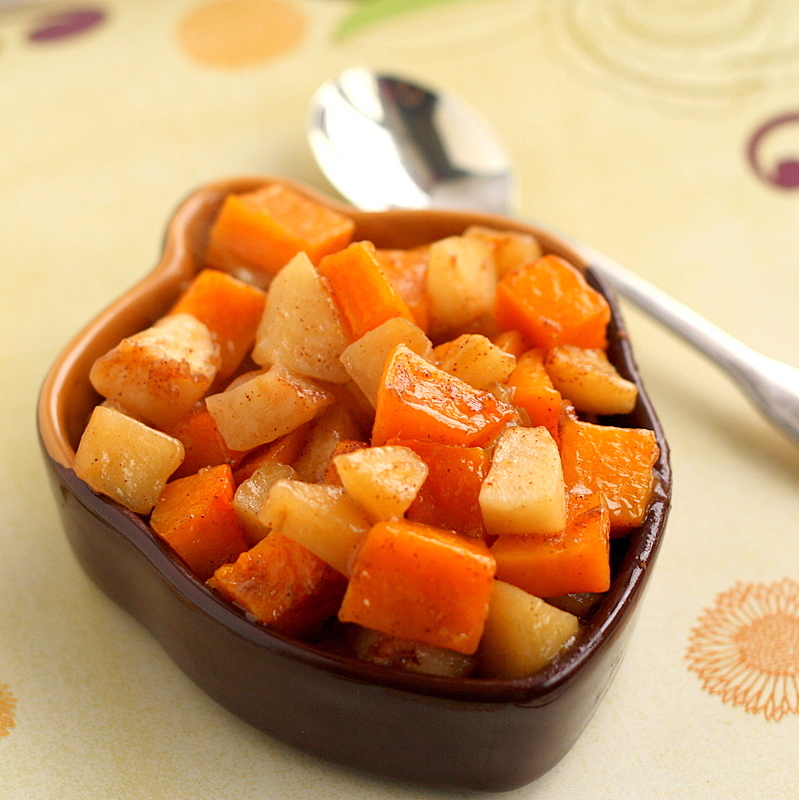
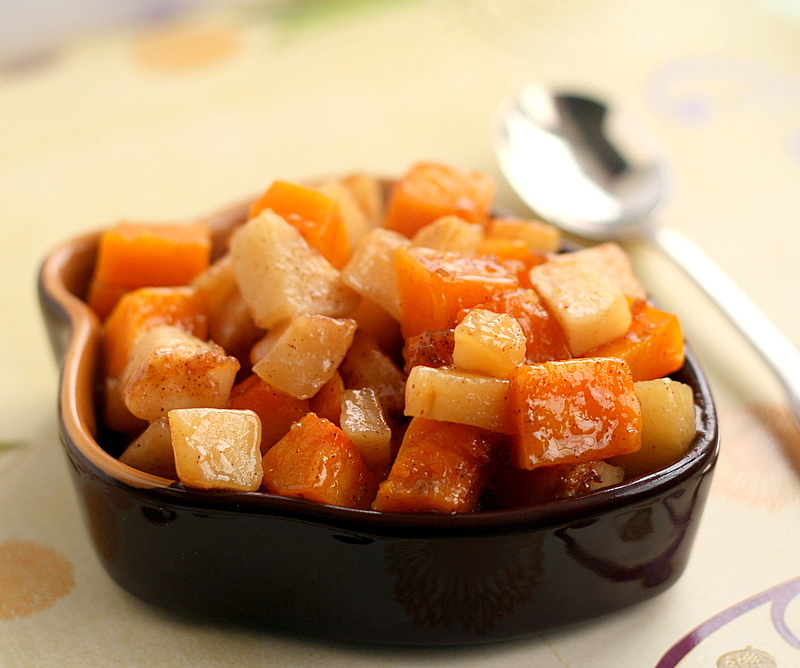
Roasted Butternut Squash and Apples

I like vegetables, but I get bored with fixing them the same old way. It doesn't help that I have a picky husband whose list of "approved" vegetables can be listed on one hand. Add to the mix a veggie cautious preschooler, who peeks curiously at his Daddy whenever a new vegetable is served, waiting to see if this is something he should eat or not. Because of this, I have threatened - er - nicely requested that my husband give a big grin and two thumbs up to any veggie served, to avoid the dreaded picky-eater-syndrome being passed on.
My husband complies with me on this, since I nonchalantly pointed out that the aforementioned "non-approved" veggies could come back to haunt him...anywhere, at any time.
Stuffed in his socks for instance.
Or piled under his pillow.
My imagination could come up with any number of possibilities I told him...and that was the end of my wifely persuasion:)
So, after being on the search for a new vegetable dish one day, I came across this recipe that I just had to try. Roasted Butternut Squash and Apples. I quickly headed to the store and picked up the squash, loaded a few apples in the cart, and was on my way home to roast the heck out of some veggies. This dish is packed with vitamin A, vitamin C, and is a great source of fiber, magnesium, and potassium.
Not to worry, you're kids will never know it's good for them, once you sprinkle a little brown sugar, cinnamon, and melted butter on top. My little guy even ate his with no prodding, while my big guy kept wisely silent.
I'm guessing he didn't wan't to find squishy squash in suspect places.
Roasted Butternut Squash and Apples
Prep time: 20 minutes / Cook time: 40-60 minutes / Serves: 8
1 Tbsp vegetable oil (to grease pan)
1 butternut squash (about 2 lbs, peeled and cut into 1/2 inch cubes)
3-4 medium apples (peeled, cored, and cubed)
1/4 cup brown sugar
1 Tbsp all-purpose flour
1/2 tsp cinnamon
2 Tbsp butter, melted
Preheat oven to 350F. Lightly grease a large baking dish. In a small bowl combine the brown sugar, flour, and cinnamon. Peel and cube your butternut squash. Peel, core, and cube your apples.

Combine the butternut squash and apples in the pan. Sprinkle the sugar mixture over the squash and apples, then pour the melted butter over the top. Cover the dish and bake for about 45 minutes, until the squash is fork tender. Uncover the dish, and continue baking until the apples and squash turn golden. About 15 more minutes.

Remove from oven and enjoy!
Cinnamon Rolls
Hello! Yes, I know...it's been a while. Yes, I've been playing hooky....but I had a really good excuse - I promise. I've been out of town for a while visiting my brother and sister-in-law who just had a new arrival. Here she is, my new niece Lilly Joy.

I thought not:)
I did manage to bake up my Twix cookies while I was there, and was wheedled by my brother to make a second batch so he could take them to work. He called that morning and said the entire plate was gone by 8:15am.
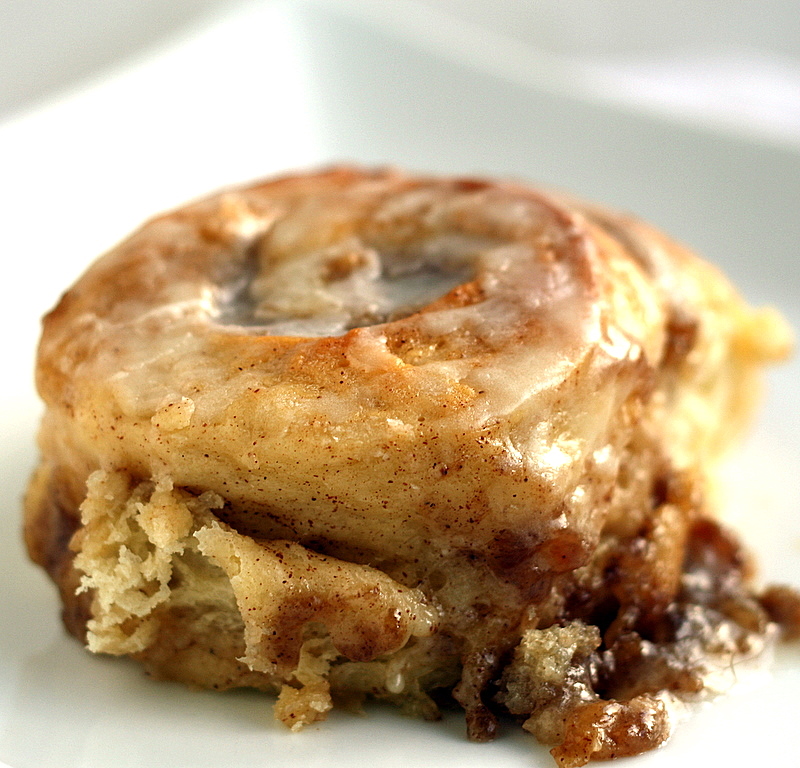
I was also in the mood to bake cinnamon rolls, and made this version, which is a great cinnamon roll, but a bit too sweet for me. Yes, I know! Cinnamon rolls are meant to be loaded with a sinful amount of sugar:) When my husband (who stayed home) found out that I had made cinnamon rolls for everyone, he guilted me into agreeing to make some for him as soon as I got home. So, once home I decided to make my usual recipe to see which roll I preferred.
I have to say that I still prefer my tried and true recipe. I don't even remember where I found it - I've had it for years - but the dough has real mashed potato and sour cream mixed into it, which keeps the dough tender and moist. The filling, called "The Smear", is soooo good. These rolls are best the day they are baked, but if they are still around the next day, just pop them in the microwave for a few seconds. If they are still around a third day...well, then something is wrong with you:) Give 'em a try, they're good!
Cinnamon Rolls
Yield: 12 Printable Recipe
Dough:
2 pkgs active dry yeast
1 tsp sugar
1/3 cup warm water
1/2 cup warm mashed potatoes (plain)
2/3 cup sugar
1/4 cup sour cream
1/2 cup melted butter
2 eggs
1 tsp salt
3 cups unbleached flour
Smear:
1/3 cup butter
1 cup brown sugar
1/2 cup white sugar
2 egg whites
2 tsp cinnamon
Glaze:
1 1/2 cups powdered sugar
1 Tbs soft butter
enough milk or orange juice to make a thick pouring glaze
Preheat oven to 350F. In a small bowl, combine the water, yeast and sugar; set aside to foam for about 5 minutes. In the bowl of an electric mixer, combine the warm mashed potato (just plain mashed potato, nothing added to it), sugar, sour cream, melted butter, eggs, and salt. Add the flour and yeast mixture. Using the dough hook, mix the dough on speed 2, for 2 minutes.
Add additional flour, 1 tablespoon at a time, until dough just cleans the bowl, but is very soft. Cover with plastic wrap and allow the dough to raise until doubled in bulk, about 2 hours. Punch down and let rise again (about another 2 hours.) On a lightly flour surface, roll the dough into a rectangle and spread with smear. (The size of the rectangle will depend on how large you want the finished rolls.) Roll dough into cylinder. Cut into 1 1/2 inch slices. Place in a greased 9x13 oblong pan.
If baking immediately: Allow the rolls to rise again until doubled. Bake for 30 - 35 minutes at 350. Remove from oven when done and brush with melted butter. Drizzle with glaze while still hot.
Overnight method: Cover the rolls with plastic wrap and place in the refrigerator to raise overnight. When ready to bake in the morning, remove rolls from the refrigerator and let stand at room temperature for about 15 minutes. Then bake at 350F for 30-35 minutes, or until golden brown. Remove from oven and brush with melted butter. Drizzle with glaze while still hot.


While the rolls are baking, combine the powdered sugar, butter, and enough milk to make a thick pouring glaze. Use a spoon or the tines of a fork to drizzle the glaze over the rolls. Use as much or as little as you like.
I had intentions to make a step-by-step tutorial, but since these were made the night before to bake in the morning, my step-by-step photos had horrible lighting and did not turn out well. Maybe next time.
**02/2013: I recently posted these Cinnamon Rolls in a new post, you can see the updated photos here.**
Enjoy!
Amber
Mince Pies with Brandy Glaze

There are certain things in life that evoke memories from your childhood. The smell of your mother's perfume as she tends to your scraped knee, the taste of holiday treats that were baked, unfailingly, each year until it turned into a tradition, and watching those old movies that you can remember from when they first came out. For me, Christmas memories are filled with the smell of cinnamon and spice drifting through the house, and the sounds of "Oh Holy Night" and other Christmas hymns as the music softly strains through a winter evening. I almost forgot. It also, absolutely, without fail, includes the rich taste of Mince Pies.
These little pies are a Christmas & New Years staple in Wales, where I grew up amid rolling, patchwork hills dotted with woolly sheep, and winding roads lined with brick row houses and the occasional thatched roof cottage. While my mother continued to cook mainly American cuisine at home, she threw in the occasional British treat that we had grown to love. Every Christmas she would go to a little bakery that sold the best mince pies, and the box she brought home would be received by us all in a hushed silence. As the lid to this box full of treasure was lifted, you could almost see the lights from heaven shining down on this glorious concoction:) And if you listened really close, you might even hear the "Hallelujah Chorus" being sung. O.K...I may be exaggerating just a little, but they were really that good.
These pies are a traditional British sweet pastry, that is usually eaten during Christmas and New Years. They can have a pastry top, or my favorite is a mince tart. The mincemeat filling is made from apple, raisins, sultanas, candied peel, spices and either suet or vegetable shortening. Mincemeat originally did contain meat in addition to the fruit, as the fruit, spices, and alcohol provided a means to preserve the meat. But nowadays the meat is usually left out. There are some that still make it with meat, but I prefer not to include it.
This year, I had a craving for these little pies that I couldn't get rid of. So I determined I would make my own - because really, where was I going to find Mince Pies in my little Missouri town? Well, my hopes of making some from scratch were dashed, since I couldn't find half of the ingredients I needed, so I settled for a jar of mincemeat filling that I found. After tasting the filling from the jar, I realized it needed some doctoring. So I added a little orange zest, orange juice, cinnamon and rum flavoring, and pronounced it decent enough. The Brandy Glaze was an experiment of random ingredients, but the end result was very tasty. The ingredients for the glaze are a rough estimate, but it should be fairly close.

Mince Pies with Brandy Glaze
Filling:
1 jar mincemeat filling (or whatever homemade mincemeat filling you like)
1 orange, zested and juiced
1/2 tsp cinnamon
1 tsp rum flavoring
Shortcrust:
1 1/2 cups + scant 2 Tbsp all-purpose flour
pinch of salt
7 Tbsp unsalted butter
3-4 Tbsp ice water
Brandy Glaze:
1 cup powdered sugar
1-2 Tbsp Brandy
1 Tbsp butter
1 tsp vanilla extract
milk
For the shortcrust pastry:
Combine the flour and salt in a large bowl. Cut the butter into small cubes and add to the flour. Using your fingertips, rub the butter into the flour, lifting the mixture up and dropping it back into the bowl – you want to keep the mixture light and airy. Keep mixing until the texture resembles fine breadcrumbs. Sprinkle the ice water into the bowl, a little at a time, and mix through with a fork. Use your fingers to bring the pastry together; it’s ready when and the sides of the bowl are clean and it’s formed a solid ball. Cover the bowl with plastic wrap and allow the pastry to rest in the fridge for at least 30 minutes.
For the mince pies
Heat oven to 400F. In a small saucepan over medium heat, mix your jar of mincemeat together with the orange zest, orange juice, cinnamon and rum flavoring. Bring to a simmer and cook for about 5 minutes. Lightly grease your tart pans
Flour your work surface and roll out the pastry as thinly as possible (about 1/8 inch). Cut out approximately 12 rounds with a pastry cutter, and place them in the base of your mini tart pans. Prick all the pie bases with a fork to stop them rising. Fill each case with about 3 tablespoons of the mincemeat mix – don’t overfill your cases or the mixture will leak through the pastry when cooking. Place the tart pans on a baking sheet, and bake for approx 20 minutes. Remove from oven and allow to cool on a wire rack.
For the glaze:
In a small microwavable bowl, combine the powdered sugar, brandy, butter, vanilla, and enough milk to reach your desired consistency. Microwave in 10 second intervals until the alcohol has cooked off, but the brandy flavor remains. Drizzle the brandy glaze over the tart filling. Store in the refrigerator and serve cold, with a dollop of whipped cream if desired.
If you want to make mini pies instead of tarts. Brush the edges of the bottom pastry with a little milk. Cut out another 12 rounds for the tops, and place over the filling. Pinch the pie edges together to seal. Brush over with egg wash and pierce the tops with a fork. Bake in the oven for approx 20 minutes until golden brown. Remove from the oven and allow to rest for 1 minute before placing on a wire rack to cool. Sprinkle the pastry tops with powdered sugar and serve warm or cold.

I hope you had a Merry Christmas, and have a Happy New Years!
Amber
Cinnamon Bark Cookies

There are some ingredients that go hand in hand with the holiday season, and cinnamon is at the top of that list for me. Sprinkle it on a dollop of whipped cream that tops a cup of hot chocolate, mix it with sugar crystals that dust a snickerdoodle, or just use the cinnamon sticks as a holiday garnish. When I came across a recipe for Cinnamon Bark Cookies in my local paper, they looked so festive I just had to make them. While the ingredients seem simple enough, there is a bit of a learning curve when making these.
Let's just say my first few attempts to assemble these cookies, resulted in a pathetic mess that you would definitely not want to leave out for Santa. I quickly disposed of those, too embarrassed to capture my failure on camera, and set about making another batch. After about the third or fourth batch, I finally got the hang of it, and was able to produce a few that weren't too shabby. These little cookies are crispy and a little buttery, with a hint of cinnamon. Yum!
 Cinnamon Bark Cookies
Printable Recipe
8 large egg whites
2 cups sugar, plus 1/4 cup
2 cups all-purpose flour
pinch of salt
1 tsp cinnamon extract
10 tbsp unsalted butter, melted and cooled
1/3 cup heavy cream
brown gel food coloring
2 tsp cinnamon
Heat the oven to 375 F. Line a baking sheet with a nonstick silicon baking mat.
In a large bowl, use an electric mixer to whisk together the egg whites and 2 cups of sugar until foamy. Add the flour and salt and mix to incorporate. Add the cinnamon extract, butter and cream, then beat again until completely smooth. In small amounts, add the brown food coloring a drop at a time until desired color is reached, stirring thoroughly between additions. In a small bowl, combine the remaining 1/4 cup sugar with the cinnamon.
Scoop a teaspoon of batter onto the prepared baking sheet. Using a small offset spatula spread the batter thinly and evenly into a rectangle about 2-by-5-inches. Depending on the size of your baking sheet, you should be able to fit 2 to 4 cookies on at a time.
Sprinkle each rectangle lightly with the cinnamon-sugar. Bake the cookies for about 5-8 minutes, or until the surface looks dry. The edges should not be browned.
Working quickly and as soon as the baking sheet comes out of the oven, use an offset spatula to flip each rectangle over. Tightly roll both long sides of each rectangle toward the center, similar to forming a scroll. Set aside to cool and repeat in batches with remaining dough.
TIPS
* These cookies must be shaped into the rolled cinnamon stick as soon as they come out of the oven.
* Only cook 2-4 cookies at a time, or the rest will cool too quickly before you can roll them.
* For best results use a silicone baking mat, but if you don't have one use a well greased baking sheet.
* To remove the cookies from the sheet, use an offset spatula.
* Spreading the batter thinly ensures even baking of this cookie. Working with the delicate cookie while still warm and pliable is essential.
 (adapted from Springfield News-Leader, December 2010)
Basic Boule

Is there any better smell than a loaf of homemade bread baking in the oven? The warm, fresh aroma drifts through the house making your nose twitch and your belly growl. It makes your family come wandering into the kitchen, circling the oven like vultures, just waiting for the chance to pounce on that lovely little loaf the second it hits the counter. Poor little loaf of bread. You never stood a chance.

 , and is such a good recipe that is extremely simple to make. What can be better than mixing up a pot of ingredients, and just letting it sit in the refrigerator to do all the work. When you are ready for fresh bread, you just break off a hunk of the dough, leaving the rest covered in the fridge. The method allows you to have fresh baked bread all week long, without having to go through the long process every day. This bread goes wonderfully with a bowl of warm soup, or it can be used for tasty panini's. If you're feeling extra naughty, you can just eat it by the handful, all day long.
Basic Boule
(from Artisan Bread in 5 Minutes A Day)
3 Cups lukewarm water (105F)
1 1/2 Tbsp active dry yeast
1 1/2 Tbsp Kosher salt (or 2 1/4 tsp table salt)
6 1/2 Cups all-purpose flour
cornmeal to dust your resting surface
For the Dough: Put the water in a large container (big enough to hold all of the risen dough - I use a 4qt stock pot). Sprinkle the yeast and salt into the water. Add all of the flour, mixing with a wooden spoon until everything is combined and no streaks of flour are left.

Loosely cover the container, not airtight, and let the dough rise and then deflate a little. About 3 hours. You can now bake your bread, or store in the refrigerator.
To bake: Dust your hands and the surface of the dough with some flour, and grab a grapefruit sized handful of dough. Gently pull the sides of the dough toward the bottom, rotating the dough until you get a smooth, round boule shape. Be gentle and try not to deflate any gas bubbles. The bottom doesn't have to be smooth, you won't see it:)

Dust a pizza peel or the back of a baking sheet with cornmeal to prevent sticking, and lay the formed dough on it. Let it rest, uncovered, for a least 40 minutes, or longer if the dough was chilled. For best results, bake the bread when no longer chilled. About 30 minutes before you are ready to bake, put a pizza stone on the middle rack of your oven, and put a broiler pan on the bottom rack. You can use any oven safe dish if you don't have a broiler pan. Preheat your oven to 450F. Dust some flour on the top of your loaf, and made 1/4-inch deep slashes on the surface of the dough.
Once the oven has preheated, slide the loaf onto the pizza stone. Pour a cup of warm water into the bottom broiler pan and shut the oven door to keep the steam inside. Bake for 30 to 40 minutes until you get a nice brown crust. Let cool completely on a wire rack. This bread is wonderful with a warm bowl of soup, or some comforting mac and cheese.

*Note: You can also bake this bread in a Dutch oven, which eliminates the need to use the broiler pan for steam. I prefer using my Dutch oven for this bread, since it makes the crust crunchier. Just place your Dutch oven in the oven to preheat, instead of using a pizza stone. Check your manufacturer's instructions for the maximum safe oven temp for your Dutch oven lid. My lid is only safe to 400F, since the handle is plastic. I plan to replace the plastic handle with a metal one from the hardware store, but in the meantime I just cover my Dutch oven with a baking sheet when making this bread.
Subscribe to:
Posts (Atom)






 Posts
Posts