
Ritzy Halloween Spiders
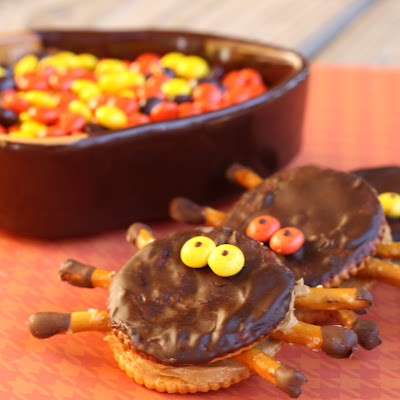
In the spirit of the holiday, I took my son to his first Halloween party last night, and brought the creepy spiders along. They turned out to be a success, so much so that my son decided they were too special to eat and befriended them, calling them his "fuzzy buddies". This new friendship was followed by a solemn oath, extracted by him from me, that I would NEVER, NEVER, NEVER, eat them. How quickly he turned on his new buddies however, when the growl of a tiny tummy got the better of him, and ended with each spider loosing a few legs, and a big chomp taking out one poor fellow's head. These little Halloween snacks are easy to make with just a few ingredients, and probably ones you already have in your cabinet.

Ritzy Halloween Spiders
(makes 15 spiders)
30 Ritz crackers
1 cup chocolate chips or candy coating chocolate (like Candiquik)
1 tsp shortening (I used non-hydrogenated coconut oil shortening)
45 pretzel sticks
1 cup peanut butter
30 mini Reece's Pieces

Place chocolate chips and shortening in a small microwavable bowl. Omit the shortening if using candy coating chocolate. Microwave on high in 30 second intervals, stirring in between, until chocolate is melted and smooth. Dip one side of 15 of the crackers in the chocolate. Place the cracker, chocolate side up, on wax paper to dry. Break the pretzel sticks in half, and dip the unbroken end of each one in the chocolate. Place on wax paper to dry. Take the 30 mini Reece's Pieces, and using a toothpick place a dot of melted chocolate in the center to make the eyes. Allow to dry. If desired, you can put your dipped item in the freezer to dry more quickly.

When the dipped crackers and pretzels are dry, take one of the 15 remaining undipped crackers, and spread with a generous amount of peanut butter. Take 6 of the dipped pretzel sticks, and place 3 on each side of the cracker, to make the legs. Take one of the dipped crackers, and smear a little more peanut butter on the undipped side, place peanut butter side down on the other cracker to make the spider. Take two of the mini Reece's Pieces eyes, and put a small dot of melted chocolate on the back. Now place the eyes on the chocolate cracker to complete the spider. You may need to adjust the pretzel legs to look right. Return the completed pretzel spiders to the refrigerator or freezer to set.

When ready to eat, remove from refrigerator, serve and enjoy!

HAPPY HALLOWEEN!

(adapted from candiquik.com)
October Daring Bakers Challenge: Donuts!

The October 2010 Daring Bakers challenge was hosted by Lori of Butter Me Up. Lori chose to challenge DBers to make doughnuts. She used several sources for her recipes including Alton Brown, Nancy Silverton, Kate Neumann and Epicurious.
This month's Daring Bakers challenge had some sentimental value to me , and ties into how I came up with the name for my blog. My grandfather was a baker, and according to my mom he made the best donuts in his bakery. I grew up with stories of how, as a little girl, she would go to the bakery with her parents, and took naps on the big bags of flour they kept in the back. This story always conjured up images of a little girl with smudges of flour on her nose, and a sprinkling of flour dusting her clothes - hence the name Sprinkled With Flour.
My grandfather was a wonderful baker, and that gene was passed onto my mom - who makes the best pies by the way - and it seems the baking itch was passed onto me too. My grandpa died when I was very young, and I never had the chance to get to know him or learn from his talent, so I started this blog to develop my baking talent and hopefully be able to do him proud one day.
I recently came into possession of his famous donut recipe, and attempted to make a batch. There is definitely an art to making donuts, and that art does not include flour flung across the kitchen, and dough hanging from places it shouldn't be hanging from. Do I need to spell out that this foray into the donut making world was a little bit of a baking disaster? Needless to say, I was embarrassed to call myself a bakers granddaughter that day. So, when I saw the Daring Baker's Challenge this month was to make donuts, I determined that I would get it right this time around - hopefully. The challenge was to make either yeast or cake donuts, and since I had already tried yeast donuts, I decided to go with "the cake". (Sorry guys, this is not my grandpa's recipe. That recipe has to stay locked in the family vault :)
I used my Halloween cookie cutters to make my donuts festive, and made bat eyes with Reece's Pieces with a dot of chocolate glaze. The glaze also works to make the ghost faces.

Old-Fashioned Buttermilk Cake Doughnuts: by Nancy Silverton
(Yield: About 15 doughnuts & 15 doughnut holes, depending on size)
1/4 cup Sour Cream
3 1/4 cup all-purpose flour (16oz + extra for dusting surface)
3/4 cup (6oz) granulated Sugar
1/2 tsp baking soda
1 tsp baking powder
1 tsp kosher salt or 1/2 tsp table salt
1 1/2 tsp nutmeg
1 1/8 tsp active dry yeast
3/4 cup + 2 tbsp buttermilk
1 large egg
2 large egg yolks
1 tbsp pure vanilla extract
1/4 cup powdered sugar (optional: for decorating)
Chocolate Glaze (adapted from Alton Brown)
1/4 cup butter, unsalted
1/8 cup whole milk
1 1/2 tsp light corn syrup
1 tsp vanilla extract
2 oz semi-sweet chocolate chips
1 cup powdered sugar, sifted
Over a large mixing bowl, sift together the flour, sugar, baking soda, baking powder, salt, nutmeg; make a large well in the center. Place the yeast in the well; pour the sour cream over it. Allow it to soften (if using packed fresh yeast), about 1 minute.
Pour the buttermilk, whole egg, egg yolks, and vanilla extract into the well. Using one hand, gradually draw in the dry ingredients. The mixture should be fairly smooth before you draw in more flour. Mix until it is completely incorporated. The dough will be very sticky. Wash and dry your hands and dust them with flour.
Sift an even layer of flour onto a work surface. Don’t be afraid to use a lot of flour. You don’t want the donuts sticking to your counter. Scrape dough out of bowl onto the surface; sift another layer of flour over dough. Working quickly, pat dough into an even 1/2-inch thickness. Dip cutter in flour and, cutting as closely together as possible, cut out the donuts and holes. Place holes and donuts on a floured surface. Working quickly, gather scraps of dough together, pat into 1/2-inch thickness, and cut out remaining donuts and holes.
Drop three to four donuts at a time into the hot oil. Once they turn golden brown, turn them and cook the other side. Cooking times may vary, but with your oil at 375 °F, they should take about 20 to 30 seconds per side. Tip: Try to keep your oil temperature even, if the oil is too hot the outside of your donuts will cook, but the inside will be raw. If the oil is not hot enough, the donuts will absorb too much oil, making them greasy.
Once cooked, place on a baking sheet covered with paper towels to drain. Sift powdered sugar over donuts or dip in glaze. If dipping your donuts in glaze, put the candy pieces on while the glaze is still wet.
For the Glaze: In a small saucepan over medium heat, combine the butter, milk, corn syrup and vanilla. Heat until butter is melted. Decrease heat to low, add the chocolate and whisk until melted. Remove from heat and stir in the powdered sugar, whisk until smooth. Immediately dip the donuts in the glaze. Allow the glaze to set for 30 minutes before serving.


Mom's Apple Squares with Maple Glaze

Does it look like fall yet in your neck of the woods? It does here. The leaves have finally started to turn, some of them having tumbled to the ground already, just waiting to be raked into big piles of kid romping fun. The only thing that doesn't feel like fall is the temperature. My son is still running around in short sleeves and shorts, and I'm still waiting for the chance to pull out his fall clothes. Long sleeved thermal shirts, hooded sweatshirts, jeans and jackets, these are a few of my favorite things....la la la. Before I break into song and scare you away forever, I will get to the matter at hand. Food. Namely, apples.
I know everyone is pulling out their apple recipes, pushing up their sleeves and whipping up hoards of apple sauce, apple butter, apple cake, apple everything. Apple, apple, apple. Have you ever said a word enough times, that it begins to sound weird? Sorta like spoon. Spoon. Spoon. OK, I'll stop now:) I'm afraid I'll be joining the ranks of the apple-dish-making-fiends, and since I've already gotten a start with my Harvest Apple Cookies, I'll proceed to my next recipe. Mom's Apple Squares with Maple Glaze. These little apple squares are the perfect combination of apples and spice, and have the perfect texture. A little crunchy on the outside, yet soft and moist on the inside. I added a little pure maple syrup to the glaze to give it that little something extra. These were good enough to get my son's vote, and I will be making them again.
Mom's Apple Squares with Maple GlazePrintable Recipe
Cake
3 large eggs
1/4 tsp salt
1 3/4 cups sugar
1 cup vegetable oil (you can substitute any oil, like coconut)
2 cups sifted all-purpose flour (whole wheat pastry flour would substitute well)
1 tsp baking soda
1 tsp ground cinnamon
1/2 tsp nutmeg
3 cups chopped unpeeled apples (Braeburn, Gala, or similar)
1/2 cup chopped walnuts
1 tsp vanilla extract
Maple Glaze
1 cup sifted powdered sugar
1 tbsp butter, softened
2-3 tablespoons whole milk
1 tbsp pure maple syrup (can use maple extract also)
For the Cake:
Preheat oven to 350F. Coat a 15x10-inch jelly-roll pan with nonstick baking spray with flour; set aside. Leave the apples unpeeled, but remove core and chop the apples into small pieces.
In the bowl of an electric mixer, combine eggs and salt. Beat at medium speed until frothy, about 1 minute. Add the sugar and oil, and beat until blended. In a medium bowl combine the flour, baking soda, cinnamon and nutmeg. Add the flour mixture to the egg mixture, and beat just until combined.
In the bowl of an electric mixer, combine eggs and salt. Beat at medium speed until frothy, about 1 minute. Add the sugar and oil, and beat until blended. In a medium bowl combine the flour, baking soda, cinnamon and nutmeg. Add the flour mixture to the egg mixture, and beat just until combined.
Fold in the apples, nuts and vanilla. Pour into the prepared pan, spreading evenly. Bake for 30 minutes or until lightly browned and set. Set the pan on a wire rack, let cool.
For the Glaze:
In a medium bowl combine the powdered sugar, butter and enough milk to make a spreadable consitency. This was about 2 tablespoons for me. Mix until smooth. Add the tablespoon of maple syrup/maple extract, and stir. Spread over the mostly cooled cake. Let the frosting set, then cut into bars.

Tip: You can also bake this cake in ramekins, just fill with batter about 1/2 - 2/3 full. If you fill too high it will spill over the sides. Bake until cake is golden and set, about 30-35 minutes. I set a small amount of my batter aside to make one ramekin, and my son loved having his own individual sized cake.


(adapted from Phyllis Hoffman Celebrate Fall 2010)
Fried Cream Cheese Tomatoes
**This giveaway is now closed.**
How about another giveaway? Could you use a little extra something to do something nice for yourself? The kind folks at CSNStores.com are at it again, and will be sponsoring another giveaway for a $35 gift certificate, redeemable at any of their stores. You can find just about anything you need among their multiple stores; modern bedding, coffee tables, kitchenware...you name it. Obviously their kitchenware gets the most of my attention. If you'd like to enter, you can find the details of the giveaway at the end of this post, where you can leave a comment to enter. Now for the recipe...
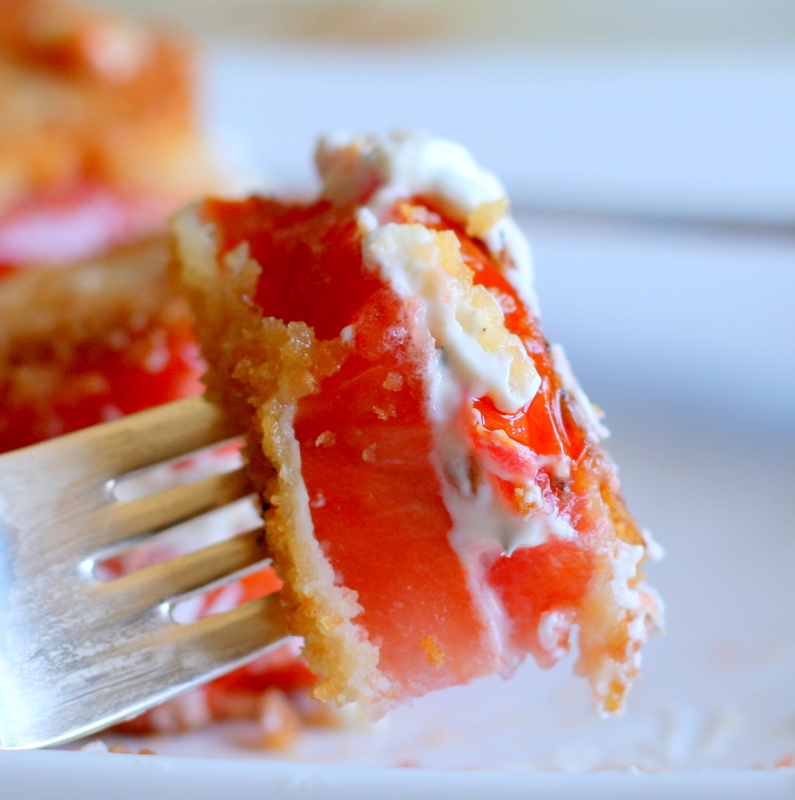
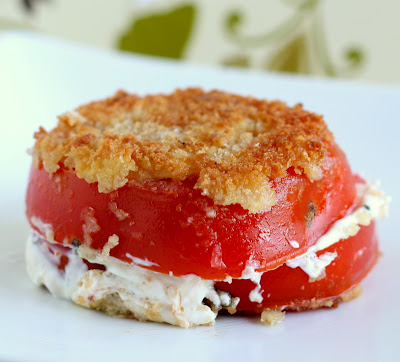
I picked up some giant tomatoes at the store the other day, already knowing what I had in mind for them. These modest 'maters were destined to become a scrumptious concoction of herbs, cream cheese and fried goodness. I present: Fried Cream Cheese Tomatoes.

How about another giveaway? Could you use a little extra something to do something nice for yourself? The kind folks at CSNStores.com are at it again, and will be sponsoring another giveaway for a $35 gift certificate, redeemable at any of their stores. You can find just about anything you need among their multiple stores; modern bedding, coffee tables, kitchenware...you name it. Obviously their kitchenware gets the most of my attention. If you'd like to enter, you can find the details of the giveaway at the end of this post, where you can leave a comment to enter. Now for the recipe...
I picked up some giant tomatoes at the store the other day, already knowing what I had in mind for them. These modest 'maters were destined to become a scrumptious concoction of herbs, cream cheese and fried goodness. I present: Fried Cream Cheese Tomatoes.

Fried Cream Cheese Tomatoes
4 large tomatoes
1 pkg (8oz) cream cheese, softened
1/4 cup minced fresh parsley (optional)
1 1/2 tsp minced fresh basil or 1/2 tsp dried basil
1 garlic clove, minced
1/4 tsp salt
1/4 cup all-purpose flour
1 cup panko (Japanese) bread crumbs
1 egg
1 Tbsp milk
3 Tbsp butter
3 Tbsp olive oil
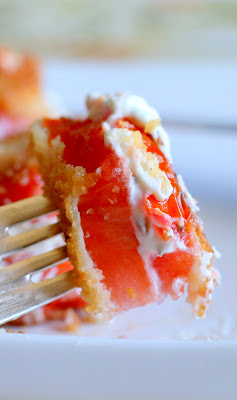
Slice each tomato into four thick slices. Place on paper towels to absorb moisture. In a small bowl, mix together the cream cheese, parsley, basil, garlic and salt until blended. Spread the cream cheese mixture over eight tomato slices; top with the remaining tomato slices.
Place the flour and bread crumbs in separate shallow bowls. In another bowl, whisk the egg and milk. Coat the top and bottom of each tomato sandwich with flour, dip in the egg mixture, then coat with the crumbs.
In a large skillet, heat the butter and olive oil over medium-high heat. Fry the tomato sandwiches in batches for about 3-4 minutes each side, or until golden brown. Drain on paper towels. Serve immediately.


Yum.

(adapted from Taste of Home June 2009)
Plum Pizza with Caramelized Onions and Crispy Bacon: Revisited

I love experimenting with different pizza toppings. Given the chance, I would eat a spinach artichoke pizza over the trusty ol' pepperoni any day. My pizza making skills are still developing however, and I've yet to make the perfect pizza crust. My tastes lean toward a thinner crust with a little bit of chew, just the right amount of soft and crispy combined. I've been wanting to try Peter Reinhart's Napoletana pizza crust for a while now, and since I had some plums, onions and bacon just lounging away on my refrigerator shelf, I decided to try the crust with my plum pizza.
I previously posted this recipe, but used a crisped up tortilla crust for convenience. While the tortilla crust worked fine, it lacked the chew that a real pizza crust can add. The crust I used is an adapted version of Peter Reinart's by 101cookbooks, and the result was pretty good. My dough was a little too sticky, even though I weighed the flour exactly, so I think I will follow the original version of the dough, which calls for a half cup more of flour. I caramelized some red onions, cooked up some crispy bacon, and a drizzle of balsamic vinegar sets it all off. This is a favorite of mine. Since there are a lot of tips and instructions for this crust recipe, I'll leave it for the pizza pro's to explain. You can find the adapted version of the Napoletana crust here.
Plum Pizza with Caramelized Onion and Crispy Bacon
1 pizza crust, homemade or store-bought
2 ripe plums, thinly sliced
1/2 onion, thinly sliced and caramelized
4 strips bacon, cooked crisp
shredded mozzarella
dried oregano, to taste
sea salt, to taste
balsamic vinegar, to taste
grated parmesan, to garnish
Preheat oven to 500F for one hour. If using a pizza stone, put it in the oven now to warm up.
For the onions: In a large heavy bottom pan, add some olive oil to cover the bottom and about 1 teaspoon of butter. When butter is simmering, add the sliced onions and stir to coat. Cook on medium high for 5-10 mins, stirring occasionally. Lower heat and continue to cook for about another 5-10 mins, stirring just when the onions start to stick to the pan, but not burn. If you stir too often the onions will not brown. You can add some sugar if needed to help the onions caramelize. When the onions are a deep caramel color, remove from heat and set aside.
For the pizza: Place the prepared circle of pizza dough on the pizza stone or cookie sheet. You can use a pizza peel or the back of a cookie sheet, sprinkled with cornmeal, to transfer the pizza. Since I was making individual sized pizzas, I just used my hands to carefully place the pizza dough on my hot pizza stone. Top with mozzarella cheese, onions and crumbled bacon, then arrange the sliced plums on top. Sprinkle some dried oregano and sea salt over the top. Place pizza in oven and bake for about 5-7 minutes, until cheese is melted and golden. Remove from oven and let cool. If desired, garnish with some freshly grated Parmesan and a drizzle of balsamic vinegar. Enjoy!

Harvest Apple Cookies with Brown Butter Glaze

I love fall recipes. There's something about the seasonal ingredients - apples, spices, toasted nuts, pumpkins and those tiny versions of grown up squash - that makes me all warm and fuzzy inside. They remind me of long, dark nights sitting at home beside a crackling fireplace, sipping hot cider, and the soft glow of a chair-side lamp, as I eat the last crumbs of a fall inspired dessert. Mom's apple squares, spiced pumpkin bread, or these Harvest Apple Cookies that I came up with are perfect for such nights.
This recipe was inspired by those little cookie kiosks in the mall. You know, the ones with rows of perfectly round, delicious looking cookies, which cost an arm and a leg for the pleasure of just one. As a kid, I used to think that these cookies were the best in the world, but as a grown up my opinion has changed. We stopped by one of these kiosks the other day, as my son eyed the sprinkle topped cookies strategically placed at his eye level. Don't you love how they do that? He got his sprinkle delight - Note: He would eat a piece of cardboard if it was covered in sprinkles - and I decided to go with something filled with apples and spice. My hopes of a fall cookie love affair were dashed, as I bit into a dry, crumbly cookie, that was bland at best. The sprinkle covered cardboard might have tasted better:)
So, still craving what I was hoping to find in that cookie, I went home to make my own. I started thinking of everything that I could put in it, and had to hold myself back from throwing in everything inside my cabinets . I ended up keeping it simple: An oatmeal based cookie with spiced dried apples, rum soaked raisins, and toasted walnuts. I decided to "fancy" a few up and drizzled them with a brown butter glaze. The result was an autumn explosion of flavor. Yum!
Harvest Apple Cookies with Brown Butter Glaze
Dried Apples:
4 tart apples - peeled and cored
1 tsp cinnamon
1/2 tsp nutmeg
1/4 tsp allspice
lemon juice
3/4 cups raisins
1 tsp rum or rum flavoring
1 tsp vanilla flavoring
hot water
Cookies:
2 sticks unsalted butter, room temperature
2 large eggs, room temperature
1 cup brown sugar
1/2 cup white sugar
2 tsp vanilla
1 1/2 cups all purpose flour
1 tsp baking soda
1 tsp salt
2 tsp cinnamon
1/2 tsp nutmeg
1/2 tsp allspice
3 cups quick cooking oats
3/4 cups toasted walnuts, finely chopped
Glaze:
4 Tbsp unsalted butter
1 1/2 cups sifted powdered sugar
1/2 tsp vanilla extract
2-3 tbsp water
For the rum soaked raisins: Place the raisins in a small bowl, cover with enough hot water to cover them. Add the vanilla and rum flavoring. Let the raisins soak for about 3 hours or overnight. When ready to make the cookies, drain the raisins and set aside.
For the spiced dried apples: Preheat oven to 275F. Peel and core 4 medium sized apples. Slice them into circles about 1/4 inch thick, and place them in a small bowl with some lemon juice. Sprinkle the cinnamon, nutmeg and allspice over the apple slices. Stir and toss with a spoon to evenly coat. Place a wire rack on a baking sheet, and arrange the apple slices on the wire rack. Put in the oven and bake for about an hour, until the apples are dried but not crisp. Remove from oven and cut into small pieces. Set aside or store in an airtight container for later use.
For the cookies: In the bowl of an electric mixer, beat the butter until fluffy. Add the sugars and cream together. Add the eggs and vanilla, mixing well. In a separate bowl, sift the flour, baking soda, salt, cinnamon, nutmeg and allspice. Gradually add the flour mixture to the sugar mixture, mixing until combined. Stir in the oats, apples, raisins and walnuts. Cover and refrigerate for at least an hour or overnight.
Preheat oven to 350F, drop cookies by heaping tablespoons onto an ungreased cookie sheet. Bake for 10-15 minutes, or until golden brown. Let cool for 2 minutes, then transfer cookies to a wire rack. In the meantime, put the 4 Tbsp of butter in a medium skillet, cook and stir over medium high heat until the butter begins to turn golden. It will begin to foam, then turn from pale yellow to golden, and small brown flecks will form in the bottom of the pan. As soon as you see the butter begin to form flecks, remove from heat. Add the powdered sugar to the brown butter, and whisk to incorporate. Add vanilla and enough water to make a drizzling consistency. Drizzle the brown butter glaze over the slightly warm cookies. Let cool. Serve and enjoy!

Note: I prepared the dried apples and raisins the day before I made the cookies. This makes less prep work for when you are ready to make your cookies.
Subscribe to:
Posts (Atom)


