
Homemade Chocolate Chip Caramel Swirl Ice Cream Sundae's

I don't know about you, but sometimes a smooth, ice cream sundae smothered in a warm, gooey topping is just the thing. I'm not usually an ice cream person, but it's my husband's favorite dessert. He is a simple man when it comes to the flavors he likes, but chocolate chip is at the top of his list. He's been complaining lately that he wished the store bought brands used whole chocolate chips, so I decided to whip him up a batch that fit his needs.
I couldn't stop with the chocolate chips though, I decided to swirl in a nice thick layer of homemade caramel sauce. This stuff is sooo good, I tend to eat it right of the spoon. Yum!
Of course, it doesn't hurt to add an extra drizzle of caramel over the finished product. I've never heard of too much caramel. Have you?
Homemade Chocolate Chip Caramel Swirl Ice Cream
Serves: 4 Printable Recipe
Chocolate Chip Ice Cream:
1 cup milk
1 cup heavy cream
1/2 cup sugar
1 tbsp vanilla extract
3/4 cup mini chocolate chips
Homemade Caramel Sauce:
(caramel recipe from The Pioneer Woman)
1 cup brown sugar
4 tbsp salted butter
1/2 cup half & half
1 tbsp vanilla extract
In a saucepan over low heat, heat the milk and sugar until the sugar is dissolved. Add the cream and vanilla, stir and allow to cool.
In a saucepan over low heat, combine the brown sugar, butter and half & half. Cook for about 7 minutes until it begins to thicken. Add the vanilla and cook for another minute or two, until slightly thickened. Allow to cool.
Pour the cooled cream mixture into an electric ice cream maker and make according to manufacturers directions. When the ice cream has thickened, add the chocolate chips and stir to combine. Then add about 1/2 cup of the caramel and stir gently with a spoon to swirl. Place in a covered container and allow to set up in the freezer at least 4 hours or overnight.
Serve sundaes with extra homemade caramel sauce drizzled on top. Eat and enjoy!
Homemade French Onion Dip

I've been in a veggie eating mood today. I'm not one of those people that can eat bowls and bowls of plain vegetables though.
I'm a bit more naughty.
I like thick, creamy dips. The kind that deep down, I know ruins the whole point of eating vegetables. This dip is full of rich, caramelized onions, fresh herbs, spices, and just a hint of balsamic vinegar. If you're watching what you eat, you can easily use light sour cream or even plain yogurt.
A dollop of this creamy goodness is perfect on a nice, crunchy, baby carrot.
(Confession: Up until recently - I was quite sure that baby carrots were a unique species of carrot that actually grew in their tiny little form. Of course, my husband gladly popped my bubble and told me the truth. Go on, you can laugh at me.)
Homemade French Onion Dip
 Serves: 6 Printable Recipe
1 large yellow onion, chopped
2 tbsp olive oil
2 tsp brown sugar
1 clove garlic, minced
1 tsp balsamic vingegar
1 cup sour cream
1/3 cup mayonnaise
1 tbsp fresh chopped parsley
1/8 tsp white pepper
salt to taste
Directions:
Heat the oil in a large skillet over medium heat. Add the onion and cook until translucent, about 10 minutes. Sprinkle 1-2 tsp of brown sugar over the onions, reduce heat to low and continue to cook for about another 10 minutes, until onions turn deep golden and are caramelized. Add the minced onion and and balsamic vinegar. Stir gently and cook for another 2 minutes. Remove from heat and allow to cool.
In a medium bowl, mix together the sour cream, mayonnaise, parsley, and pepper. When onions have cooled off, add to the sour cream mixture and stir. Use a stick blender to puree the dip to desired consistency. Add salt to taste, if desired. Refrigerate until cold or overnight. Serve with crackers, chips, veggies, or anything you wish!
Enjoy!
Amber

Chipotle Grilled Chicken Tacos with Pineapple Slaw

I've got a recipe to share today, one that will make your mouth get all drooly and your taste buds all tingly.
This is the kind of recipe that makes you get all excited over leftovers. Any dish that makes you happy about leftovers is a keeper in my book! The main star is a delicious smoky,chipotle marinaded chicken. Of course, it doesn't hurt when it's topped with a tropical pineapple slaw. Throw it all in a fresh corn tortilla and you've got dinner.
Suuuuuuey! Can you believe that's what my dad used to yell up the stairs at us kids when it was time to eat. Apparently he had a pig farm in another life before I was born. Thanks Dad, it's every teenage girl's dream to be likened to a pig right before she's about to eat.
To grab this recipe head on over the Tasty Kitchen Blog, you can read the full post and get the handy-dandy printable too.
Enjoy!
Amber

Glazed Key Lime Snack Cake
 Well, my husband went back to work today. He took the end of last week off, so he could go with me to drop the kiddo off for his first day of Kindergarten.
We ran around so much and kept busy, that today is a bit of a shock for me. The house is so.....quiet.
I keep expecting to hear stampeding footsteps running down the stairs, mysterious thumps from above, and the assuring sound of toys being clashed together.
A quiet house is just not right.
I have to admit, it was much easier to get my next recipe baked, photographed, and posted. Without having to stop every 5 minutes to snap Iron Man's head back on, or find a particular piece of Lego the size of a flea, it's amazing how much I can get done.
I decided to make a tasty after-school treat for my newly school-bound son - O.K. I admit it, the cake is for me.
This cake is so moist and light, and then drizzled in a tart lime-glaze that seeps down into the cake through poked holes. It's not too sweet and not too heavy. A perfect snack cake.
Glazed Key Lime Snack Cake
Serves: 12 Printable Recipe
1 package (3oz) lime gelatin
1 1/2 cups sugar
2 cups flour, sifted
1/2 tsp salt
1 tsp baking powder
1/2 tsp baking soda
5 eggs
1 1/3 cups cooking oil
3/4 cup orange juice
1/2 tsp vanilla
1/2 lemon, juiced
For the Glaze:
1/3 cup key limes (or regular limes)
1 cup powdered sugar, sifted
Directions:
Soak gelatin in a little bit of cold water (a few tablespoons) for 3-5 minutes. Combine sugar, flour,salt, baking powder, baking soda, and gelatin in a mixing bowl. Add eggs, oil, orange juice, vanilla, and lemon juice. Mix until combined.
Pour batter into a greased 9" x 13" pan and bake at 350F for 30 minutes, or until a toothpick inserted into the center comes out clean. Let cool in the pan for 15 minutes. Prick cake all over with a fork. Drizzle well with the lime glaze.

Chocolate Snickers Layer Cake

Something rich, something chocolaty....something that would be a candy lovers dream.
He is a candy lover. So much so, that I'm pretty sure the cashiers at the convenience store by our house know him by name.
My last candy concoction for him was my Chunky Twix Cookies. Those cookies were so out of this world good, I now have the reputation in our family as the Twix Cookie girl. That recipe has also made it's way around the blogging world. Yes, they are that good.
So for this candy creation I made a super moist chocolate cake, threw in some snickers bars, cream cheese frosting and homemade caramel sauce. Wow. This cake is knock your socks off good. It is rich, but birthday's only come once a year, right?
 Chocolate Snickers Layer Cake
Serves:16 Printable Recipe
1 3/4 cups all-purpose flour, plus more for pans
2 cups sugar
3/4 cups cocoa powder
2 tsp baking soda
1 tsp baking powder
1/2 tsp salt
1 cup buttermilk
1/2 cup vegetable oil
2 large eggs, room temperature
1 tsp pure vanilla extract
1 cup freshly brewed hot coffee
butter, for greasing the pans
12 fun sized snicker bars, cut into small pieces
Homemade Caramel Sauce, recipe follows
Cream Cheese Frosting, recipe follows
Directions:
Preheat the oven to 350 F. Grease two 8-inch x 2-inch round cake pans with butter. Line with parchment paper, then butter and flour the pans.
Sift the flour, sugar, cocoa, baking soda, baking powder, and salt into the bowl of an electric mixer, mix on low speed until combined. In another bowl, combine the buttermilk, oil, eggs, and vanilla. With the mixer on low speed, slowly add the wet ingredients to the dry. With mixer still on low, add the coffee and stir just until combined. Pour the batter into the prepared pans and bake for 35 minutes, or until a toothpick inserted into the center comes out clean. Cool in the pans for 30 minutes, then turn them out onto a cooling rack and cool completely.
Place 1 layer, flat side up, on a flat plate or cake pedestal. With a knife or offset spatula, spread the top with frosting. Scatter some of the snickers pieces over the icing, then drizzle a little caramel sauce over it. Place the second cake layer on top, rounded side up, and spread the frosting evenly on the top and sides of the cake. Press two rows of snickers pieces into the sides of the bottom edge of the cake, all around the cake. Decorate the top of cake with remaining snickers pieces. Drizzle caramel sauce over the cake. Serve and enjoy!
Homemade Caramel Sauce:
(Recipe from The Pioneer Woman)
1 cup brown sugar, packed
1/2 cup half and half
4 tbsp butter
pinch of salt
1 tbsp vanilla extract
Mix the brown sugar, half-and-half, butter and salt in a saucepan over medium-low heat. Cook while whisking gently for 5 to 7 minutes, until it gets thicker. Add the vanilla and cook another minute to thicken further. Turn off the heat, cool slightly and pour the sauce into a jar. Refrigerate until cold.
Cream Cheese Frosting:
12-oz cream cheese, room temperature
1 1/2 sticks of unsalted butter
1 1/2 tsp vanilla extract
5 1/2 cups powdered sugar
In the bowl of an electric mixer, combine the cream cheese, butter and vanilla until smooth. Slowly add the powdered sugar and beat until combined. I like to put my frosting in the fridge to firm up a bit before frosting my cake.
Enjoy!
Amber

Grilled Peaches with Honey Ginger Cream Cheese Fluff

I've still got a ton of peaches left over from our peach picking trip, and I was really excited to use some of them in this delicious Tasty Kitchen recipe for Grilled Peaches with Honey Ginger Cream Cheese Fluff, submitted by Jessica of A Kitchen Addiction.
I'm not usually allowed near the grill. In our house, it is solely the property of my husband. Whenever I offer to grill something, I get a very quick, "No, that's o.k. I'll do it." I guess it's a man thing. He did however, graciously allow me a few minutes with his precious baby, so I could whip up these tasty grilled peaches.
I guess he figured I couldn't hurt anything in the 3 minutes it took to grill these.
They're filled with a super yummy spiced, honey cream cheese fluff, yep, the same stuff I used on my Patriotic Parfaits. This stuff is so versatile the possibilities are endless. Plus, I just like saying fluff.
Who doesn't love a dessert with fluff?
You can grab the recipe over at Tasty Kitchen, and see my full post.
Enjoy!
Amber
Frozen Blueberry Lemonade

Happy Monday everyone! I hope you all had a wonderful weekend. We had family come visit us, so we decided to take a trip to the St. Louis Zoo. For the most part we had a fun time, even if most of the animals seemed to be suspiciously hiding from us.
Then, as predicted, my son decided his legs were incapable of carrying him about halfway through. But they miraculously started working again when the possibility of ice cream came up.
Funny how that works.
This morning I'm still recovering from a day full of zoo-wrangling (the kid kind, not the animal kind), and a night full of sugar-induced, company-crazed, kid hysteria.
Is my child the only one who bounces off the walls anytime someone comes over?
You'd think we kept him locked in the closet. Seriously, between him and my dog, I'm amazed anyone comes over.
So today I'm whipping up a slushy, frosty treat. Something to cool me down from yesterday, something to make me....chill. Frozen Blueberry Lemonade. It's so easy. Just make a batch of my recipe for Mom's Lemonade, some yummy blueberry syrup, add some ice, and you've got a great treat for any hot day. You can mix the syrup in with the frozen lemonade, but I like to add it to the bottom of a glass and then pour the lemonade over it. It makes it feel just a tad more...fancy.
Who doesn't love a "fancy" drink?
Frozen Blueberry Lemonade
Serves: 4 Printable Recipe
2 cup Mom's Lemonade
4 cups ice cubes
4 tbsp homemade blueberry syrup
Blueberry Syrup:
1 cup fresh (or frozen) blueberries
1 cup sugar
fresh squeezed lemon juice
Prepare the syrup: Blend the blueberries in a blender until smooth. Place the pureed blueberries and sugar in a saucepan, bring to a boil and cook for about 2 minutes. Remove from heat and set aside. Squeeze the juice of half a lemon into the syrup. You can place the syrup in the refrigerator at this time to cool down.
Prepare recipe for Mom's Lemonade, printable recipe below. I found a good ratio for lemonade to ice was 1:2. Place 2 cups of lemonade and 4 cups of ice cubes in a blender. Blend until ice is well crushed. Pour about 2 tablespoons of the blueberry syrup in the bottom of a frosty glass, then pour frozen lemonade over the syrup to fill up glass.
Note: I used small mason jars to serve, if you use larger glasses you may want to use more syrup in each glass.
Mom's Lemonade Printable Recipe.
Serve and enjoy!
Amber

Chocolate Chip Crumb Bars

I had a vision last night. Actually, I seem to have them rather frequently lately. My recent nightly visions are of the 4 ft tall variety. The kind that come adorned in Spiderman pajamas, carrying well worn stuffed animals, and who like to climb into bed with you. Which somehow always ends with me taking a knee to the nose or an elbow in my stomach.
So as I was laying in bed, trying to go back to sleep - not an easy task when 40 pounds of knees, elbows and flailing limbs has you in his grasp - I began thinking of food. I've been throwing around variations to my Blackberry Crumble Bars for a while, and last night I really wanted to turn these into a chocolate lovers best friend.
It was simple really. Just swap the berries for chocolate chips, and voila! Chocolate Chip Crumble Bars. These turned out so good. I'm talking lick the pan good. Good thing we have company coming tomorrow, otherwise I would be in trouble if I had these sitting around all to myself.
Chocolate Chip Crumb Bars
Servings: 9 squares Printable Recipe
Crust & Topping:
1 1/2 cups all-purpose flour
3/4 cup sugar
1/8 tsp salt
3/4 cup (1 1/2 sticks) butter, chilled
Filling:
2 eggs
1/2 cup brown sugar
1/2 cup white sugar
1/2 cup sour cream
6 tbsp flour
pinch of salt
1/2 tsp vanilla extract
1 cup milk chocolate chips, plus 1 tbsp flour
Directions:
For crust/topping: Preheat the oven to 350 degrees. Grease a 9x9 inch baking pan. Combine the flour, sugar, and salt in a medium bowl. Cut the butter into 1/2-inch cubes, and add to the flour mixture. Using a fork for pastry cutter, cut the butter in until mixture resembles coarse crumbs. Reserve 3/4 cup of the mixture to use as the topping. Press the remaining mixture into the bottom of the pan, and bake for 10-12 minutes. Cool for 10-15 minutes.
For filling: Whisk the eggs in a large bowl, then add the white and brown sugar, sour cream, flour, salt and vanilla extract. Toss the chocolate chips with the tablespoon of flour, this helps prevent the chips from sinking to the bottom. Gently fold the chocolate chips into the batter and pour the mixture over the crust. Scatter the remaining flour mixture evenly over the filling, and bake 35-45 minutes.
Cool for 1 hour before cutting into bars. Serve with fresh whipped cream, cold ice cream, or just eat straight from the pan!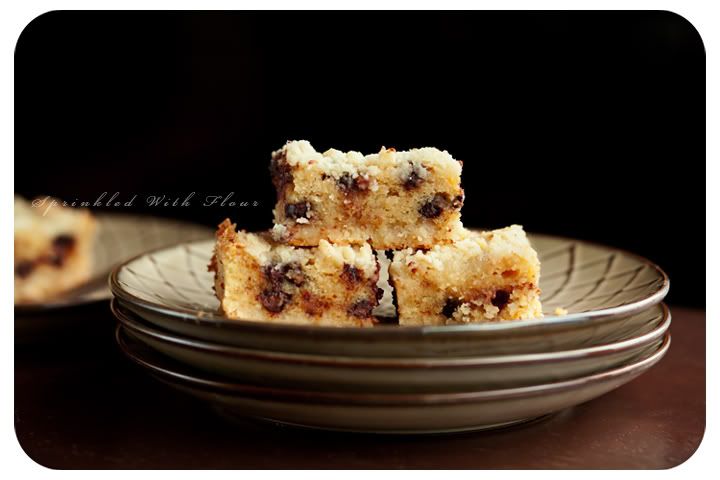

Subscribe to:
Posts (Atom)


